Funcionamiento Impresora para Sublimación
Introduction to Sublimation Printing
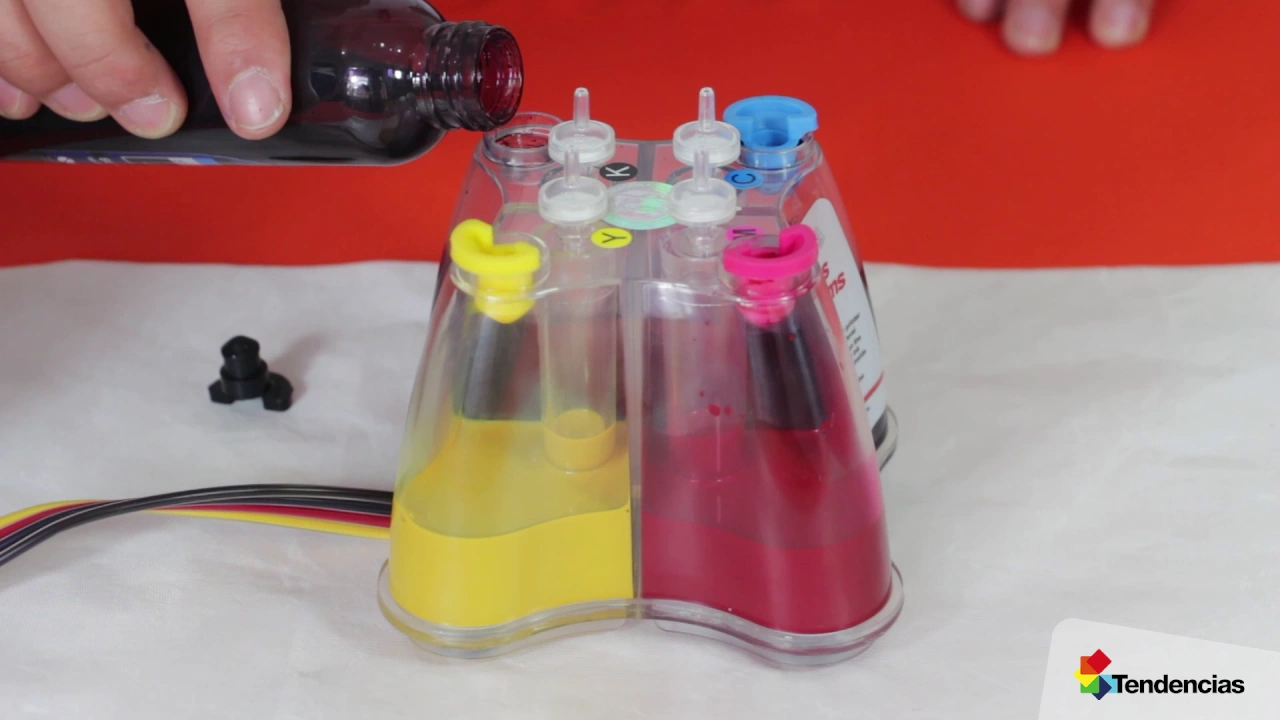
In this section, the speaker introduces the topic of sublimation printing and provides an overview of the printer and its components.
Printer Setup and Recommendations
- The printer comes with a sublimation kit, including inks, cartridges, hoses, filters, power cable, and USB connector.
- It is recommended to use an Epson printer as it easily adapts to sublimation ink.
- Not all printers are suitable for sublimation printing.
- When traveling or transporting the printer, ensure that the ink cartridges are at the same level as the printer to avoid flooding or ink spills.
Sublimation Paper Types
This section explains different types of sublimation paper and their ideal uses.
Reference Number 114 Paper
- This paper has two sides: partially yellow and white.
- Print on the white side for optimal results.
- It is ideal for rigid materials such as ceramics and textiles.
Reference Number K Paper
- This paper has both sides partially yellow.
- Print on the side with a textured surface.
- It is suitable for textiles, ceramics, bags, caps, etc.
- After printing, let it dry for 10 minutes before use.
Roll Paper
- Print on the outer side of the roll paper.
- It is ideal for textiles and flat or rigid objects.
- Let it dry for approximately 4 hours before use.
Setting Up the Printer
This section covers setting up the printer before starting sublimation printing.
- Place the printer in your desired location with tanks positioned beside it.
- Remove small plugs from tanks and replace them with filters provided in the box.
- Fill tubes partially by removing large plugs to prevent ink spillage during transportation.
Printer Connection and Installation
This section explains how to connect the printer and install necessary software.
- Connect the printer to a power source.
- Connect the printer to the computer using a USB cable.
- Insert the printer installation CD into the computer and follow the installation process.
- Perform a test print to ensure proper inkjet functionality.
Printing Templates and Design Configuration
This section covers downloading templates, selecting products, and configuring designs for printing.
- Download printing templates from the website.
- Select the desired product and open it in a design program (e.g., Trends).
- Configure the design file in RGB mode (or CMYK if preferred).
Design Placement and Exporting
This section explains how to place designs correctly and export them for printing.
- Place your design on the workspace with appropriate bleed or margin for alignment.
- Recommended background enlargement of 3-6 millimeters.
- Export your design in preferred formats such as PDF, JPG, PNG, or directly print from your design program.
Mirror Printing and Final Preparation
This section emphasizes mirror printing for sublimation purposes and final preparations before printing.
- Ensure that your design is mirrored before printing to achieve correct orientation on the product.
- Exception: Crystals do not require mirror printing.
- After following all previous instructions correctly, your file is ready for printing.
Maintenance Tips
This section provides maintenance tips for optimal printer performance.
- It is recommended to clean printheads every 20 prints.
- If prompted to change cartridges, press the ink drop button for recognition by the printer.
- If print quality issues persist after cleaning, remove the problematic cartridge, extract the ink using a syringe, and wait for the ink to flow properly.
Conclusion