🔥🔥🔥 PLANTA ArquitectOnica PHOTOSHOP | TUTORIAL PASO A PASO | ARQUITECTURA ambientada y humanizada
Plantas Arquitectónicas en Photoshop
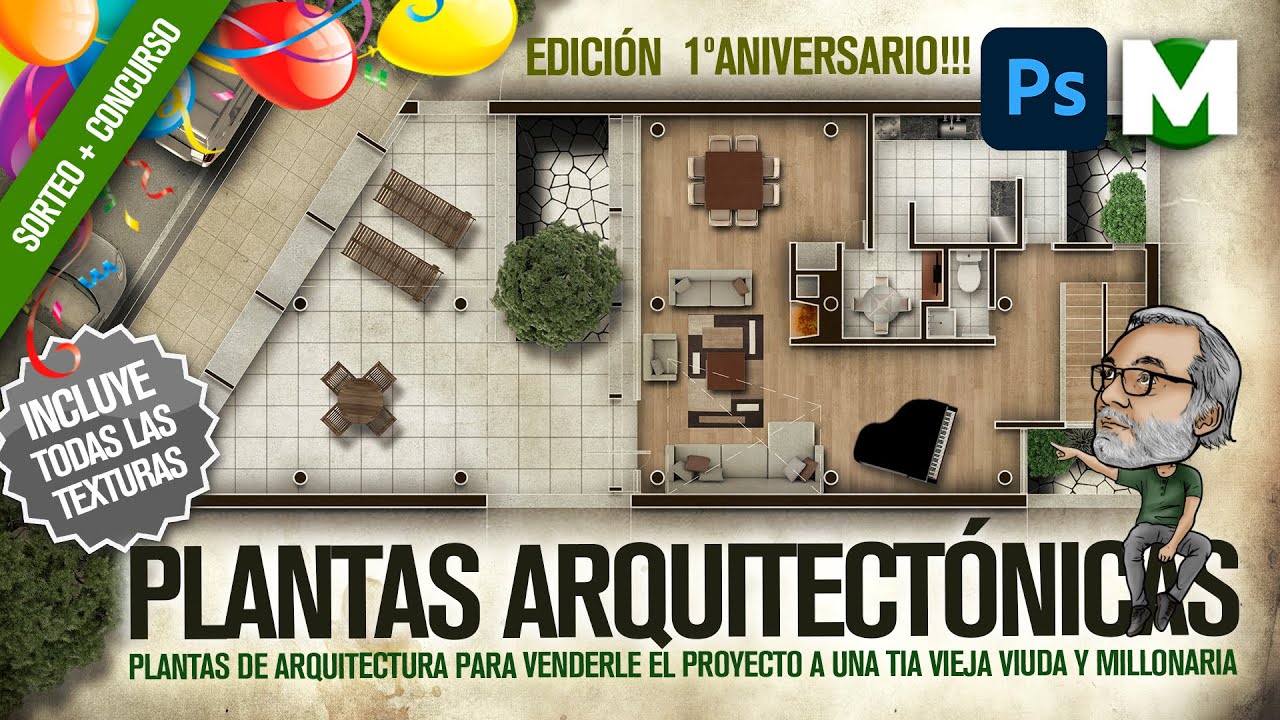
In this tutorial, the speaker demonstrates how to create architectural floor plans in Photoshop using a step-by-step approach. The focus is on the method and workflow rather than achieving a specific final result.
Importance of Architectural Floor Plans
- The method taught allows for creating various types of architectural floor plans, as showcased in competition entries.
- There is a growing interest in humanizing architectural floor plans to appeal to non-technical audiences and potential clients.
Purpose of Architectural Floor Plans
- Architectural floor plans are essential for marketing projects to real estate agencies, appearing in sales brochures, posters, and advertisements.
- These plans are designed to showcase the project without overwhelming technical details, focusing on selling the concept to potential buyers.
Tutorial Details and Approach
- The tutorial provides textures for creating a specific architectural plan while encouraging viewers to follow along and replicate the process.
- Techniques used in the tutorial have been extensively covered in previous videos related to architecture collages and watercolor sketches.
Creating Architectural Floor Plans in Photoshop
- Initial steps involve exporting a PDF with only necessary lines for the floor plan, excluding auxiliary elements like arrows or stair indicators.
- Importing the PDF into Photoshop requires attention to detail regarding resolution settings and layer management for effective editing.
Working with Layers and Organization
- Managing layers involves deactivating unnecessary elements within Photoshop layers panel settings.
- Ensuring clarity while working involves adjusting grid visibility settings or adding a solid background color behind transparent areas.
Detailed Photoshop Tutorial
In this section, the speaker demonstrates how to work with layers in Photoshop to create different elements for a design project.
Working with Layers
- When clicking on layers, boundaries are shown. It is essential to have all layers visible to work effectively.
- Sampling all layers allows precise selection of specific parts for editing, such as creating pavement and curbs.
- Creating uniform colors for elements like pavement and curbs by grouping them into folders for better organization.
- Exploring textures by replacing solid colors with textures like pavement texture, adjusting rotation and position accordingly.
- Duplicating layers using shortcuts and organizing them within folders for better management.
Creating Textures and Patterns
This part focuses on incorporating textures and patterns into the design project using external sources and Photoshop tools.
Adding Textures
- Using online resources to find suitable patterns or textures for elements like pavements or walls.
- Importing an image found online into Photoshop, resizing it to fit the design canvas, and defining it as a pattern.
- Defining a selected area as a pattern within Photoshop for further use in the project.
Applying Patterns
- Utilizing defined patterns to fill selected areas within the design project efficiently.
- Adjusting angles and scales of patterns to align correctly with the design elements.
Enhancing Design Elements
This segment covers refining design details by adjusting transparency modes, colors, sizes, and other properties of elements in the project.
Refining Design Elements
- Modifying transparency modes of textures to blend them seamlessly with underlying colors while retaining visibility.
- Customizing sizes, colors, transparencies of elements like tiles or backgrounds easily within Photoshop.
Final Touches
Detailed Photoshop Editing Techniques
In this section, the speaker demonstrates advanced Photoshop editing techniques, focusing on selecting specific areas, creating patterns, adjusting textures, and applying effects to enhance the visual elements of the design.
Selecting Specific Areas for Editing
- Select a specific area by using masks and deleting unwanted parts.
Creating Patterns and Textures
- Generate new layers for different elements like stairs with varying textures.
- Adjust the scale and orientation of patterns to fit different areas.
Refining Selections and Texturing
- Fine-tune selection tolerances to ensure precise texture application.
- Experiment with scaling and selecting textures for various sections like patios.
Applying Effects for Depth Perception
- Utilize layer blending options to add depth through effects like inner shadows.
- Enhance dimensionality by modifying shadow parameters such as opacity, angle, distance, and size.
Enhancing Visual Elements with Effects
- Apply effects like inner glow with subtle settings to avoid overpowering visuals.
- Copy layer styles to maintain consistency across design elements.
Organizing Design Elements
- Group different components into folders for better organization and management.
- Ensure proper layer hierarchy for efficient editing workflows.
Detailed Photoshop Tutorial
In this section of the tutorial, the instructor provides guidance on using Photoshop to work on a design project.
Working with Layers and Selections
- Selecting walls for editing by creating a new folder named "walls" and carefully selecting wall sections using the magic wand tool while holding down Shift.
- Emphasizing the importance of zooming in when making selections to avoid accidental clicks and ensuring precise selection of desired areas.
Adding Color and Elements
- Creating a new layer for uniform black color after selecting wall sections, followed by adding vehicles into a separate folder named "vehicles."
- Adjusting size and position of vehicle images by dragging them onto the canvas, resizing, rotating, and arranging them within the composition.
Enhancing Details with Shadows
- Applying shadows to elements by right-clicking on layers, choosing blending options, selecting drop shadow, adjusting settings for desired effect, and copying the style to other elements.
Interior Design Elements
This part focuses on incorporating furniture items into the design project using Photoshop.
Furniture Placement
- Placing bathroom fixtures like toilet and faucet by importing images into Photoshop, rotating them as needed, scaling for proportionality, and arranging within the layout.
- Ensuring proper scaling of objects to maintain realistic proportions within the design composition.
Adding Details and Textures
- Enhancing realism by adding subtle shadows to objects like toilets through layer effects such as drop shadow with customizable distance and opacity settings.
Kitchen Design Enhancement
Focusing on detailing the kitchen area within the design project for added realism.
Kitchen Setup
- Emphasizing the importance of an appealing kitchen design in selling a project by including luxurious elements like stainless steel appliances and marble countertops.
Texture Application
Designing a Landscape in Photoshop
In this section, the speaker discusses the process of designing a landscape in Photoshop, focusing on elements like furniture, vegetation, and textures.
Repostera que duda tener y no sé si se le va a bancar la gorda
- The speaker mentions uncertainty about handling doubts related to design elements.
- Reference to a specific location or structure with multiple components.
Agrupa las capas y añade muebles y vegetación
- Instructions on grouping selected layers for organization.
- Adding furniture or equipment elements to the design.
- Incorporating vegetation such as trees and plants for realism.
Llenando el diseño con plantas y sombras
- Filling the design with plants and shadows for depth.
- Moving tree elements from Photoshop to the design canvas.
- Adjusting rotation and applying appropriate shadows.
Enhancing Design with Textures
This part focuses on enhancing the landscape design by incorporating textures and adjusting the overall aesthetic appeal.
Aplicando texturas al entorno del diseño
- Addressing concerns about excessive white space in the background.
- Exploring texture options and selecting an appropriate one for application.
Ajustes finales con máscaras y selecciones
- Utilizing masks to refine specific areas of the design.
- Applying textures effectively to enhance visual impact.
Refining Design Details
The discussion centers around refining specific details within the landscape design through advanced editing techniques.
Invertir colores para mejorar la visualización de líneas
- Demonstrating how color inversion can improve line visibility within the design.
Aplicando capas de ajuste para efectos personalizados
Detailed Photoshop Tutorial
In this section, the speaker provides a detailed tutorial on using Photoshop, focusing on layer duplication and opacity adjustments.
Layer Duplication and Opacity Adjustment
- The speaker demonstrates how to duplicate a layer by pressing "Ctrl + J" after selecting the desired layer.
- Adjusting the opacity of a layer is shown as a way to control its transparency, making it less intense.
- Explains an optical illusion related to line thickness in PDF files due to pixel interpolation on screens.
- Emphasizes that AutoCAD ensures accurate printing despite screen resolution issues.
- Shows how to import a PDF file into Photoshop with matching parameters for editing.
Enhancing Visual Elements in Photoshop
This part focuses on refining visual elements in Photoshop through duplication and adjustment techniques.
Refining Visual Elements
- Demonstrates duplicating lines for protection and adjusting their appearance with shortcuts like "Ctrl + J."
- Introduces applying effects like parallel shadow or outer glow to enhance walls' appearance.
- Shows adding textures and adjusting opacity levels for depth and texture enhancement.
- Utilizes masks, blending modes, and color corrections to refine specific areas of the design.
Advanced Editing Techniques in Photoshop
This segment delves into advanced editing techniques in Photoshop for further enhancing visual elements.
Advanced Editing Techniques
- Demonstrates saturation adjustments and additional texturing layers for richer visuals.
- Illustrates applying tonal adjustments, curves, and color corrections for cohesive design elements.
- Introduces gradient maps for color correction and overall aesthetic improvement.
Final Touches and Presentation Tips
The final part covers finishing touches, presentation tips, and considerations for achieving a polished design.
Final Touches
- Guides on selecting gradients from Photoshop's library to enhance visual appeal effectively.
- Emphasizes subtle adjustments like shadows' retouching for realistic outcomes.
Presentation Tips
Detailed Photoshop Tutorial
In this section, the speaker provides a detailed tutorial on using Photoshop to manipulate colors and layers effectively.
Adjusting Layer Styles
- The speaker demonstrates how to adjust layer styles to generate a solid color above a cape.
- Explains the difference between opacity and fill in adjusting layer styles.
- Shows how to make adjustments invisible by setting 0% fill but 100% opacity.
Enhancing Shadows and Highlights
- Adjusting shadows and highlights for better visual appeal.
- Utilizing shadow effects to enhance elements like plants in the design.
Refining Color Effects
- Modifying colors and effects for a more cohesive design.
- Addressing issues with white lines by adjusting opacity levels strategically.
Anniversary Celebration and Contest
This part focuses on celebrating an anniversary event, conducting a contest, and engaging with the audience through interactive activities.
Anniversary Celebration
- Announcing the channel's anniversary celebration.
- Engaging viewers in selecting winners for contests through voting processes.
Contest Drawings
- Conducting drawings for contest participants with enthusiasm.
- Excitement over selecting winners and encouraging participation in future events.
Audience Engagement
- Encouraging audience participation through voting for favorite designs.
- Providing clear instructions for participating in contests through comments sections.
Gratitude Towards Viewers
Expressing gratitude towards viewers for their support, engagement, and participation throughout various activities on the channel.
Viewer Appreciation
- Thanking viewers for their active involvement in channel activities.
- Acknowledging viewer contributions and dedication to interactive tasks on the channel.
Reflection on Experience
- Reflecting on the enriching experience gained from viewer interactions during challenging times.
Gratitude and Acknowledgments
In this section, the speaker expresses gratitude towards various individuals who have supported and contributed to the channel's success.
Expressing Gratitude
- The speaker thanks the viewers for their support, highlighting that teaching has been a significant learning experience.
- Acknowledgment is extended to viewers from different parts of the world for their support in keeping the channel running.
- Recognition is given to Jonathan and Luis for moderating the Facebook group, essential for its functionality.
- Viewers are encouraged to join the Facebook group and thanked for following on Instagram despite not being able to respond to all messages due to time constraints.
- Apologies are made for missing out on thanking Francisco Mercado for illustrations and appreciation expressed towards family members for their support.
Acknowledging Support
This section focuses on acknowledging key individuals who have played crucial roles in supporting the channel's operations.
Acknowledging Key Contributors
- The speaker expresses gratitude towards Francisco Mercado for creating illustrations used in thumbnails.