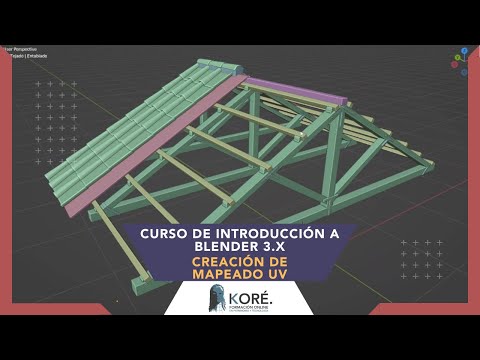
Creación de mapeado UV
Introduction
In this video, the instructor explains how to correctly map objects so that textures and materials can be easily applied. The instructor recommends working with mirrors to save on graphics processing and suggests starting from the top of the object list and working downwards.
Mapping Objects
The instructor recommends mapping objects one by one, starting from the top of the list and working downwards. They suggest maintaining mirrors to save on graphics processing.
Automatic Mapping
- To automatically map an object, select it in Object mode, ensure that scale is applied, check face orientation, remove double vertices, go to UV Editing mode, select all faces, press U for Unwrap menu and choose Smart UV Project.
- Ensure that the mapping does not exceed beyond a square box.
Manual Mapping
- To manually map an object in UV Editing mode:
- Select all faces
- Press U for Unwrap menu
- Choose Unwrap
- Adjust as necessary using G (grab), R (rotate), S (scale)
Conclusion
The instructor concludes by reminding viewers of important steps such as applying scale before mapping objects and ensuring that maps do not exceed beyond a square box.
Mapeado de objetos
En esta sección, el instructor muestra cómo hacer el mapeado de un objeto utilizando la herramienta Smart Project en Blender.
Uso de Smart Project para mapear objetos
- Se puede utilizar la herramienta Smart Project para mapear objetos en Blender.
- Es posible ajustar el margen entre las islas del objeto y mantener su rotación original.
- Para verificar que el mapeado está correcto, se debe ir a la pestaña "Material" y crear un nuevo material con una textura.
- La textura creada se puede desplegar sobre el objeto seleccionando "Hacer Texture" y arrastrando la textura al objeto.
Contrapares
En esta sección, el instructor muestra cómo aplicar contrapares a los objetos en Blender.
Aplicación de contrapares
- Los contrapares pueden ser aplicados a los objetos utilizando la herramienta Juve Editing.
- Es posible utilizar Smart Project para desplegar los contrapares en los objetos.
- El mirror no debe ser aplicado a los contrapares.
Introduction
In this section, the speaker introduces the material they will be working with and explains how they will proceed.
Selecting Material
- The speaker chooses to work with existing wood material.
- They select "wood 1" and proceed.
Working with Roof Ridge
In this section, the speaker works on the roof ridge of their project.
Manual Mapping
- The speaker selects an edge and uses it to manually map out where they want to cut their geometry.
- They use a combination of shift-clicking and right-clicking to mark edges in red that will be used for cutting.
- Once all desired edges are marked, they select everything and press "U" then "Unwrap".
- They then select the island they just created by going into Island Selection mode.
Applying Material
- The speaker applies "wood 1" material to their roof ridge.
Working with Deck Boards
In this section, the speaker works on deck boards for their project.
Manual Mapping
- The speaker repeats the same process as before for manual mapping of deck board geometry.
- They apply "wood 2" material to their deck boards.
Adding Metal Reinforcements
In this section, the speaker adds metal reinforcements to their project.
Applying Material
- The speaker applies "metal" material to their metal reinforcements.
Adding Rivets
In this section, the speaker adds rivets to their project.
Manual Mapping
-The speakers uses a similar process as before for manual mapping of rivet geometry.
Applying Material
-The speakers applies "metal" material to their rivets.
Manual Selection of Edges
In this section, the instructor demonstrates how to manually select edges in Blender.
Selecting Edges Manually
- Use Alt key to select loops and Shift + Alt to select borders.
- Use Shift key to deselect edges.
- Use Clear Seam option to remove unwanted cuts.
- Pack islands after selecting all edges.
Applying Textures
In this section, the instructor explains how to apply textures in Blender.
Mapping Textures
- Rotate the texture using the mouse wheel.
- Apply Subdivision modifier before applying Array modifier.
- Apply Array modifier before Mirror modifier.
- Adjust margin value for better results.
Manual Selection of Borders
In this section, the instructor demonstrates how to manually select borders in Blender.
Selecting Borders Manually
- Use Shift + Alt keys to select borders.
- Use Clear Seam option to remove unwanted cuts.
- Pack islands after selecting all borders.
Unifying Eyebrows in UV Mapping
In this section, the speaker explains how to unify all eyebrows in a single UV map.
Unifying Eyebrows
- To unify all eyebrows in a single UV map:
- Select two eyebrows and enter edit mode.
- Select all and press "V" to open the vertex menu.
- Choose "Average Island Scale" to make them the same size.
- Pack islands and name them correctly.
- This process is important for ensuring that textures appear correctly on models.
Checking Textures on Models
In this section, the speaker demonstrates how to check if all models have their textures applied correctly.
Checking Textures
- To check if all models have their textures applied correctly:
- Go back to layout mode.
- Turn on all models and see if they have their texture applied.
- All five materials used in this tutorial should be present.
Turn any video into a summary like this
YouTube links, meetings, lectures. With transcripts, search, and chat.