PrusaSlicer Beginner Tutorial: Learn the basics
Introduction and Configuration Setup
In this section, the speaker introduces Prusa Slicer as a free slicing software and guides users through the initial setup process.
Setting Up Prusa Slicer
- Prusa Slicer is highlighted as one of the best slicers available, emphasizing its free accessibility.
- The configuration wizard in Prusa Slicer assists in setting up printers by selecting printer types and nozzle sizes.
- Users can add custom printer profiles for non-Prusa or other vendor printers in the configuration wizard.
- Filament presets for temperature and speed can be downloaded, with an option to automatically update software and presets.
User Interface Overview and Model Importing
This section focuses on navigating the user interface of Prusa Slicer and importing models for printing.
User Interface Navigation
- The build plate in the center represents the print area, allowing rotation, movement, and zoom functions for better visualization.
- Different modes (simple, advanced, experts) cater to varying user expertise levels within Prusa Slicer.
- A feature to import models by selecting the "add" button is demonstrated for model placement on the build plate.
Model Handling
- Multiple models can be added to the build plate, with options to reposition them to avoid overlap or distribute evenly.
Edit Tools Overview
In this section, the speaker explains the various edit tools available in Prusa Slicer for manipulating 3D models.
Edit Tools Functionality
- Move tool allows precise selection of axes, including Z-axis. Default setting snaps model back to build plate.
- Scale tool enables editing individual axes or uniformly scaling by dragging orange square cubes.
- Rotation tool permits rotation based on different axes, ensuring the model stays on top of the bed at the selected angle.
- Place on Face tool repositions models to have a selected face flat against the print bed.
- Cut tool divides tall models into separate parts for printing within workspace limits.
Print Settings Exploration
This part delves into print settings in Prusa Slicer, covering layer height, perimeters, infill, and other crucial parameters.
Print Settings Details
- Layer height determines extruder movement per layer; smaller layers enhance resolution but increase print time.
- First layer height influences initial adhesion and can compensate for minor bed imperfections.
- Perimeters define outer layers of the model; 2 to 3 perimeters are usually sufficient.
- Infill creates internal structure without solid plastic throughout; density percentage controls infill strength.
3D Printing Settings Overview
This section delves into various print settings for 3D printing, including top and bottom fill patterns, skirt and brim settings, and support material options.
Top and Bottom Fill Patterns
- Top and bottom fill patterns are crucial for the strength and heat dissipation of 3D prints.
- Rectilinear may be preferred for items with small or thin areas.
- These patterns impact the top and bottom layers of the print.
Skirt and Brim Settings
- Skirt and brim serve as a single layer perimeter around the model's base.
- Skirt marks out the model's perimeter before printing begins to ensure filament flow.
- Brim is physically attached to the model's bottom layer, aiding adhesion on thin models.
Support Material
- Support material acts as temporary scaffolding for overhangs during printing.
- It provides a solid base for complex structures that would otherwise print in mid-air.
- Options include generating support material, auto-generating supports, and supporting only on the build plate.
Filament Settings Exploration
The focus shifts to filament settings in 3D printing, covering aspects like filament diameter, temperature considerations, retraction settings, and more.
Filament Diameter and Characteristics
- Filament diameter is typically 1.75 millimeters for most FDM printers.
- Variations in filament diameter can affect extrusion amounts; calibration may be necessary.
- Consider factors like density, cost, spool weight for price estimates but not essential for slicing.
Temperature Settings
- Nozzle temperature varies based on filament type (e.g., PLA or PETG) and manufacturer recommendations.
- First layer nozzle temperature is often slightly higher to enhance bed adhesion.
- Bed temperature influences adhesion; cooling requirements depend on the material used.
Retraction Settings
- Retraction involves pulling back filament temporarily during movements or layer changes.
Setting Extruder Lift and Printer Settings
In this section, the speaker discusses setting the extruder lift during retraction and navigating printer settings in Prusa Slicer.
Adjusting Extruder Lift
- Adjusting extruder lift can help with issues like stringing or blobbing.
Printer Settings in Simple Mode
- Printer settings in simple mode offer limited options unless switching to a different printer.
Extruder Tab Options
- Under the extruder tab, you can modify nozzle diameter and default retraction settings.
Slicing Model and Viewing Controls
This part covers slicing a model in Prusa Slicer and utilizing viewing controls for detailed inspection.
Slicing the Model
- Click "slice" to generate a preview of the printed model.
Viewing Controls
- Use controls to view inside the print at different layer heights.
- Watch tool path motion of the current layer for printing insights.
Print Details and Exporting Gcode
The speaker explains print details display, various view modes, and exporting Gcode in Prusa Slicer.
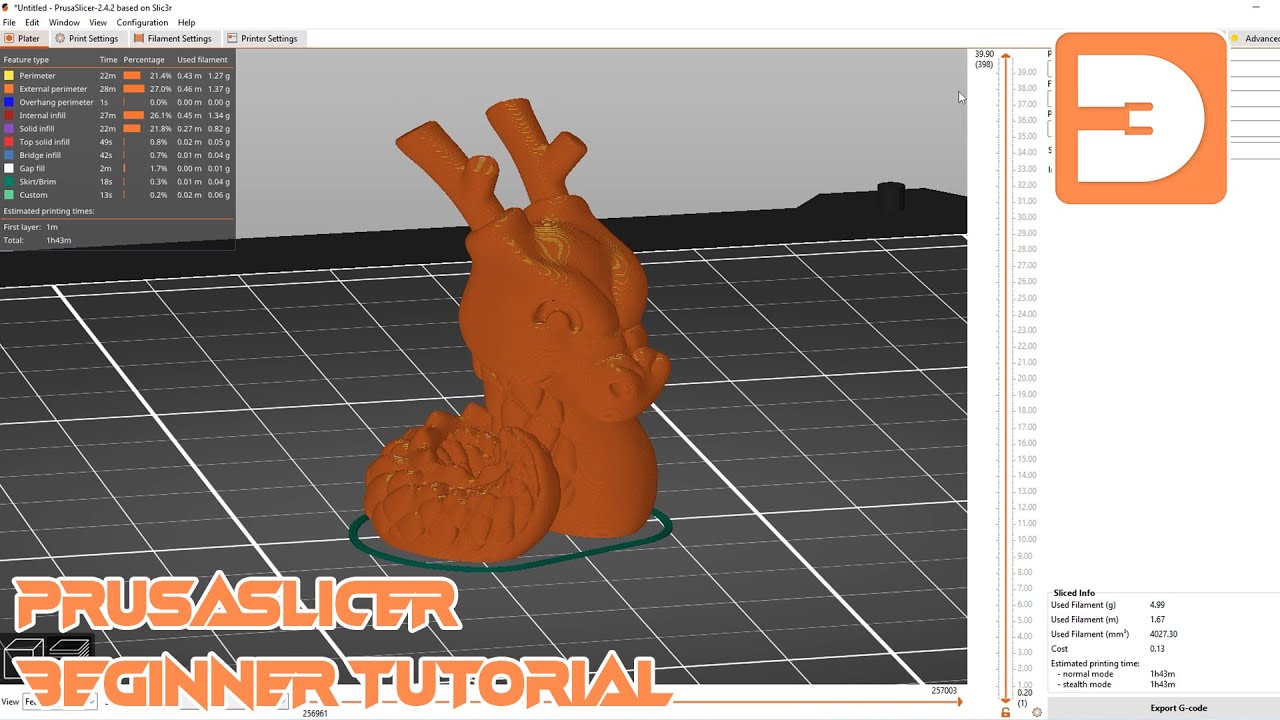
Print Details Display
- Get a rundown of print details including filament usage, cost estimation, and printing time.
View Modes
- Explore different view modes highlighting features like exterior perimeters or print speed.
Exporting Gcode
- Easily export Gcode by clicking on the export button; save directly to an SD card if connected.