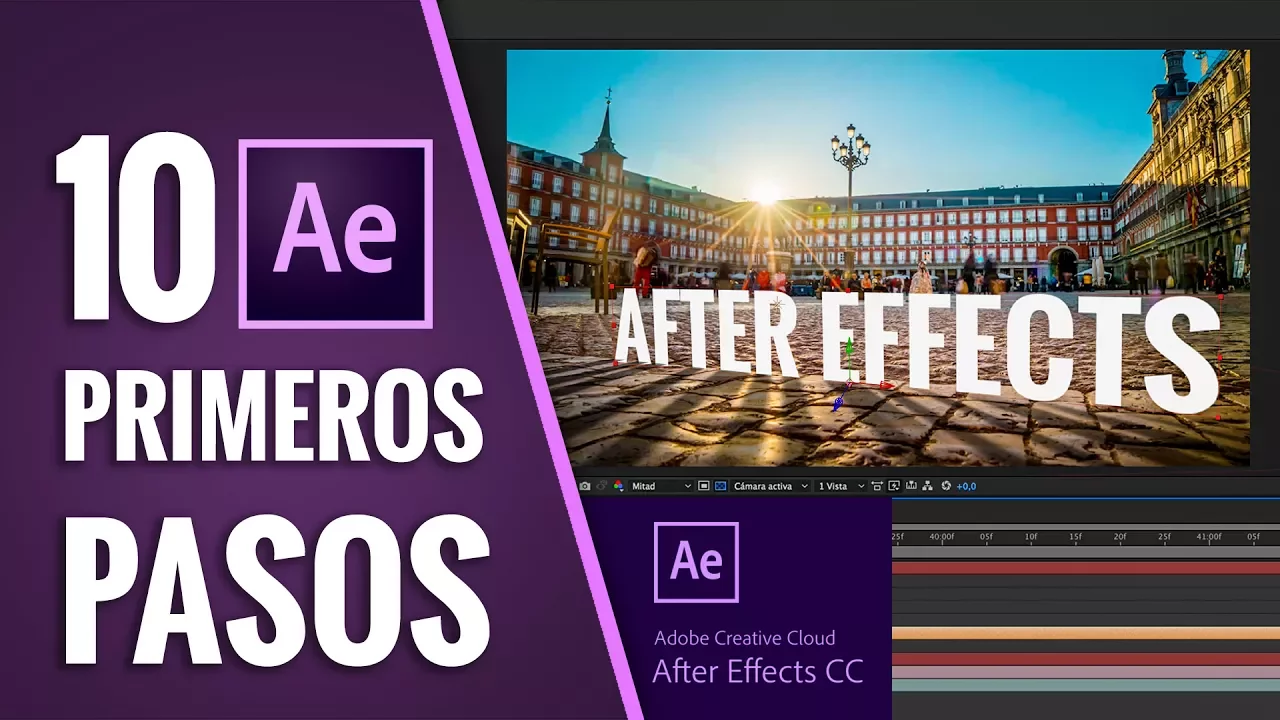
10 PRIMEROS PASOS para usar AFTER EFFECTS CC
New Section
The introduction to a tutorial on After Effects, highlighting its power and versatility for video creation.
Introduction to After Effects
- RunbenGuo introduces the video tutorial on After Effects, describing it as a powerful application similar to a mix of Photoshop and Premiere, tailored for video editing with features like 3D, motion graphics, text animation, and special effects.
- A comprehensive eight-hour course with 65 episodes has been created by RunbenGuo for beginners and intermediate users to master After Effects from basics to advanced levels.
- RunbenGuo outlines the ten basic steps essential for starting with After Effects, aiming to provide a concise yet informative guide despite the complexity of the software.
Understanding the Interface
Exploring the interface elements in After Effects for effective navigation and understanding.
Interface Elements
- The interface includes the Project Panel on the left containing imported and created materials, while controls for effects applied to specific layers are found on the right.
- Components such as Project Panel, materials, effects controls are crucial. Composition acts as a monitor showing ongoing work; Layer Panel focuses on individual layer edits. Various tools like selection tool, pen tool are available for different tasks.
- Tools like rotation tool, unified camera tool aid in specific actions like creating shapes or working with cameras. Other windows include information panel, audio preview panel essential during editing processes.
Creating Compositions
Detailed steps on creating new compositions within After Effects for various projects.
Composition Creation Process
- To start a new composition in After Effects, navigate to 'Composition' > 'New Composition', where settings such as name, dimensions (e.g., 1920x1080), frame rate (e.g., 30fps), duration can be customized based on project requirements.
What is Composition in After Effects?
In this section, the speaker introduces the concept of composition in After Effects and demonstrates how to access and navigate through the software interface.
Understanding Composition in After Effects
- Composition symbol explained as a tutorial named "After Effects" opens at the bottom of the screen.
- Importing materials into compositions by double-clicking on the project panel or exploring different methods for importing.
- Selecting specific materials for import, such as illustrative images, to understand layer functionalities better.
- Exploring a 2.5D photo available for download from the speaker's website, emphasizing working with layered Photoshop files.
- Importing Photoshop files as compositions with editable layers or merged layers based on user preference.
Creating Compositions with Imported Materials
This segment focuses on creating new compositions using imported materials and adjusting properties within After Effects.
Creating New Compositions
- Differentiating between importing materials directly and creating new compositions while retaining imported material properties.
- Demonstrating various ways to import files, including dragging and dropping or using the import file option.
- Utilizing existing Photoshop file layers to create a new composition within After Effects seamlessly.
Understanding Layer Hierarchy and Color Settings
The discussion shifts towards layer hierarchy within compositions and adjusting color settings for optimal visual representation.
Layer Hierarchy and Color Settings
- Explaining layer hierarchies similar to Photoshop where top layers dominate lower ones, affecting visibility within compositions.
- Adjusting layer positions to ensure proper visibility by rearranging layers based on their importance in the hierarchy.
- Addressing color discrepancies due to different color spaces between source material and After Effects; resolving by adjusting project settings.
Animating Layers and Layer Properties
Delving into animating layers within compositions and manipulating individual layer properties for enhanced visual effects.
Animating Layers
- Introducing animation concepts by hiding unnecessary layers using the eye icon next to each layer name for focus on specific elements.
- Batch hiding multiple layers simultaneously by clicking, dragging, and releasing over desired target layers for streamlined workflow.
Layer Properties Adjustment
Exploring advanced features like defining layer modes for blending effects within compositions effectively.
Defining Layer Modes
Concept of Layer Properties and Animation
In this section, the speaker discusses layer properties and animation concepts in After Effects.
Layer Properties
- Layers in After Effects have transform properties that can be animated.
- The anchor point is where effects or changes are applied from; changing it alters the reference point for transformations like rotation.
Animation Basics
- Animation in After Effects involves creating keyframes to define different values over time.
- Keyframes freeze specific values at certain times, allowing for gradual changes between keyframes to create animations.
Interpolation of Frames
- Interpolation determines how intermediate frames behave between keyframes, affecting acceleration and deceleration.
- Linear interpolation maintains consistent speed, while curved interpolation allows for varied speeds and accelerations.
Enhancing Animations with Frame Interpolation
This section delves into frame interpolation techniques to enhance animation fluidity.
Linear vs. Curved Interpolation
- Linear interpolation results in constant speed transitions between keyframes.
- Curved interpolation offers options like smooth acceleration or deceleration for more organic animations.
Customizing Interpolation
- The graph editor allows users to adjust velocity curves, enabling customization of animation speed transitions.
Advanced Tools for Animation
Exploring advanced tools within After Effects to refine animation techniques further.
Advanced Animation Features
Detailed Explanation of Animation Techniques in After Effects
In this section, the speaker explains the concept of interpolation of frames and demonstrates how to create shapes for animation in After Effects.
Understanding Interpolation of Frames
- Voting is explained as an easy-to-understand concept that involves changing the interpolation of frames to create smoother animations.
- Shapes like rectangles and ellipses can be created using tools like the rectangle tool (Q) and ellipse tool. It's crucial to deselect layers to avoid creating masks unintentionally.
- Transforming shapes involves adjusting anchor points for precise positioning. The speaker demonstrates changing positions over time by manipulating anchor points.
Creating Smooth Animations with Shape Layers
This part focuses on animating shape layers effectively by adjusting positions and utilizing keyframes for smooth transitions.
Animating Position Changes
- Adjusting position changes involves setting keyframes at different time intervals to create smooth movements.
- Copying and pasting keyframes allows for maintaining consistent positions during animations, ensuring fluid transitions.
- Fine-tuning animations by shortening keyframe durations and modifying acceleration curves enhances the organic feel of the motion.
Enhancing Animation with Scale Transformations
The speaker elaborates on animating scale transformations to add depth and realism to animations in After Effects.
Scaling Techniques
- Modifying scale properties enables creating effects like squashing or stretching objects during motion sequences.
- Adjusting scale values independently allows for distorting shapes realistically, enhancing visual impact within animations.
- Utilizing keyframes strategically for scaling transformations results in dynamic and engaging animation sequences.
Applying Effects in After Effects
Exploring how effects can be applied efficiently within After Effects projects without overwhelming complexity.
Effect Application
Desenfoque y Mate de Seguimiento
In this section, the speaker demonstrates how to apply a Gaussian blur effect and explains the concept of tracking matte in video editing.
Applying Gaussian Blur Effect
- Gaussian blur is used for applying simple effects by selecting an object and dragging the effect onto the desired layer.
- The hierarchy of effects matters; placing one effect above or below another affects the final outcome.
- The clock icon indicates that effects can be animated, allowing for dynamic adjustments like blurring intensity over time.
Understanding Tracking Matte
- Tracking matte involves indicating a layer's transparency based on another layer's alpha channel or luminance.
- By setting a layer to "mate alfa," it adopts the alpha channel of the layer above, controlling its visibility.
Mate de Seguimiento: Ejemplos Prácticos
This part delves deeper into practical examples of using tracking mattes for creative video editing purposes.
Implementing Tracking Matte Techniques
- Utilizing "mate alfa" instructs a layer to be visible based on the alpha channel of another layer, enabling selective visibility.
- Exploring "mate alfa invertida" reveals parts where there is no overlap between layers, offering versatile control over visibility.
Aplicaciones Avanzadas: 3D en Edición de Video
The speaker introduces 3D capabilities in video editing software and explains how flat objects can be transformed into 3D space.
Transitioning to 3D Editing
- Activating 3D mode involves converting flat objects into three-dimensional space, expanding movement options beyond traditional dimensions.
Understanding 3D Animation in After Effects
In this section, the speaker discusses the concept of working in a 3D space within After Effects, emphasizing shortcuts and techniques for efficient workflow.
Working with 3D Space
- Explains how to convert 2D objects into 3D within After Effects.
- Demonstrates adjusting object positions in the x, y, and z axes to create depth perception.
- Highlights the ability to animate objects in different axes within a 3D space.
Exporting Projects in After Effects
This part focuses on the final steps of processing, rendering, and exporting projects from After Effects.
Rendering and Exporting
- Discusses manual vs. shortcut methods for setting export parameters.
- Details selecting export settings like QuickTime format for compatibility across devices.
- Explains codec choices such as animation or H.264 based on project requirements.
Finalizing Projects and Further Learning
The speaker concludes by outlining final steps in project completion and offers resources for deeper learning about After Effects.
Project Completion and Learning Resources
- Summarizes essential knowledge for beginners using After Effects.
- Encourages further exploration through online courses provided by the speaker.