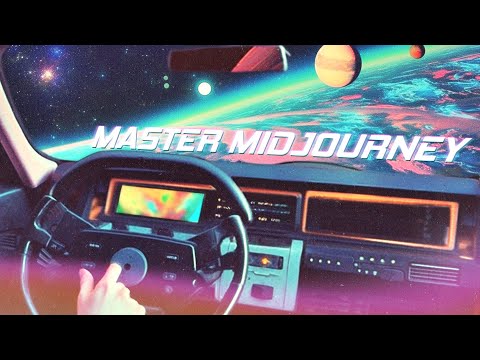
MidJourney MASTERY Beginner's Guide - EVERYTHING You Need to Know! (AI Art Tutorial 2023)
Mid-Journey Beginner's Guide for 2023
In this video, the speaker provides a comprehensive guide to using Mid-Journey, an AI art generator. The video covers everything from discovering what Mid-Journey is to using it professionally.
What is Mid-Journey?
- Mid-Journey is an AI art generator that uses a process called "clip" to sort images based on their styles and types of medium.
- Unlike other models, Mid-Journey constantly retrains itself on its own and has a lot of wizardry behind the scenes with regards to how they manipulate the prompt you give it to give you the best results.
- To use Mid-Journey, you will need a Discord account.
Getting Started with Mid-Journey
- You will need a free Discord account to join with Mid-Journey.
- After signing in with your Discord account, go to your username at the bottom and click "go to Discord."
- Once in the server, navigate to the mid Journey channel on the left-hand side.
Using Mid-Journey
- To use Mid-Journey, type "!help" in the mid Journey channel for instructions.
- Use prompts that are specific and detailed for better results.
- Experiment with different settings such as temperature and top-k values for more control over your generated art.
Conclusion
Mid-journey is an incredibly powerful tool that can be used by anyone, from beginners to professionals. With the help of this guide, you can get started with Mid-Journey and create beautiful art in no time.
Overview of Mid-Journey
In this section, the speaker provides an overview of Mid-Journey, a Discord bot that generates images based on prompts.
Introduction to Mid-Journey
- Mid-Journey is a Discord bot that generates images based on prompts.
- To get started with Mid-Journey, users can join the Newbie rooms and type in prompts.
- Users need to be on a paid plan to use Mid-Journey as the trial has been temporarily disabled.
Using Mid-Journey
- The main image generation in Mid-Journey is created through the slash imagine command.
- Users can generate their first image by typing "/imagine" followed by a prompt such as "a very happy puppy sitting by a park bench."
- By default, Mid-Journey generates a grid of four low-resolution images for users to work with.
- Users can save generated images by right-clicking and saving them or copying them into their photo editor.
Other Features
- There are separate threads for announcements, updates, rules, support and feedback polls.
- Moderation tools are coming soon according to the latest update.
Using Mid-Journey to Generate Images
In this section, the speaker explains how to use Mid-Journey to generate images and upscale them.
Generating Images
- To generate an image, type "/imagine" followed by what you want to generate.
- The server will render the image with more detail at a higher resolution.
- You can watch the progress of your image as it generates on Discord.
- Once generated, you can save or view the image on the Mid-Journey website using your Discord account.
Upscaling Images
- To upscale an image, click on the "upscale" button next to it.
- You can choose from different versions of upscaling by clicking on V1 through V4 buttons.
- Once upscaled, you can view and save the high-resolution copy of the image on the Mid-Journey website.
Making Variations
- If you want to make variations of an image, click on the swirly button next to it.
- This will send off a command to generate a new set of images based on the same idea.
Using Mid-Journey Website
In this section, the speaker explains how to use Mid-Journey website and navigate through it.
Accessing Your Profile Page
- Every image generated with Mid-Journey is stored on their servers and available on their website through your profile page.
- Log in with your Discord account used for generating images.
- On your profile page, you can find virtually every image you have ever generated with Mid-Journey.
Viewing Generated Images
- Clicking on an image takes you to its page where you can view and download it.
- You can also mark images as favorites which will show up on your profile page.
Understanding Mid-Journey
In this section, the speaker explains how to use Mid-Journey, a Discord bot that generates images. They cover the different channels and threads available in the program and walk through generating an image using a prompt.
Using Mid-Journey
- The program has introduced a new billing email address and moderation tools.
- To start using Mid-Journey, you need to subscribe to a plan as the trial is temporarily disabled.
- In the Newbie room, type "/imagine" followed by your prompt to generate an image.
- If you can't find your generated image, click on the inbox icon in the top right corner of Discord.
Generating Images
- After typing your prompt, Mid-Journey will generate four low-resolution images for you to choose from.
- You can save these images by right-clicking and selecting "save image," but they won't be high quality.
Using Mid-Journey's Website
In this section, the speaker explains how to use Mid-Journey's website to view and manage generated images.
Basics of Using Mid-Journey's Website
- The website allows you to view your images, sort by upscales, and view related images generated by other people.
- You can hide or publish individual images in your private generated stuff and rank them to help train the algorithm.
- Ranking is important because it helps mid-journey train its algorithm. Abusing ranking may result in a ban.
- You can save, add to favorites, report harmful images, create collections, and copy information about prompts using the three dots on individual images.
- You can copy the full command used to generate an image or just the prompt text. Seed and job ID are also available for identifying an image later on.
- The rate jobs button takes you through all of your past generated images on a queue to rank them and improve the algorithm.
- Explore lets you see the entire community's set of generations which allows you to get tons of inspiration.
Favorites
- Once you have favorited some images, you can now view them over here in the top column where it says favorites.
Anatomy of a Prompt
In this section, the speaker explains the anatomy of a prompt and how to use it to generate images using DALL-E.
Components of a Prompt
- A prompt consists of three main components:
- The image command
- The subject description in plain text
- Parameters for manipulating the image generation process.
- The subject description is broken up into direct subject-oriented descriptions in plain text with commas and extra descriptive material.
- Parameters include aspect ratio, seeds, chaos element, quality slider, etc.
Aspect Ratio
- Aspect ratio is one of the parameters that can be used to generate different width or height for an image.
- Two by three aspect ratio is more typical for portrait orientation.
Interacting with Other Images
- Users can interact with other people's images while waiting for their own images to generate.
Upscaling Images
- It is recommended to only upscale the images that you want to keep and work with them individually during the creative process.
Anatomy of a Prompt Recap
- A prompt consists of an image command, subject description in plain text, and parameters.
- Parameters include aspect ratio, seeds, chaos element, quality slider.
- Two by three aspect ratio is more typical for portrait orientation.
- Users can interact with other people's images while waiting for their own images to generate.
- It is recommended to only upscale the images that you want to keep and work with them individually during the creative process.
Mid-Journey Style and Injecting Prompts
In this section, the speaker discusses the differences between the default mid-journey style and the new photorealistic model. They also introduce additional prompts that can be used to create better images, such as styles, flavor text, art mediums, composition, and camera choices.
Mid-Journey Style
- The default mid-journey style is hand-drawn and color-pencil-like.
- The new model looks more photorealistic by default.
Injecting Prompts
- Additional prompts can be injected into prompts to produce better images.
- These prompts include styles, flavor text, art mediums, composition, and camera choices.
Direct Messaging the Bot
- You can direct message the bot to work more privately.
- This allows for a quieter and more focused environment for generating images.
Using Seeds for Consistent Results
- A seed is a noise pattern used to generate an image.
- Using the same seed over and over can lead to more consistent results.
Analyzing a Prompt: Creating a Surreal City Scene
In this section, the speaker analyzes a prompt for creating a surreal city scene. They discuss how different elements of the prompt influence mid-journey's design choices.
Analyzing the Prompt
- The core part of the prompt is space science images in a photo library.
- Other elements include surreal city scenes as a style to emulate, realistic anamorphic art with swirling colors as an element to consider.
- Trans compilation CD can be used as an influence for design elements.
Referencing Other Artists' Styles
In this section, the speaker discusses how to reference other artists' styles when using mid-journey. They also touch on the controversy surrounding AI art and plagiarism.
Referencing Other Artists
- You can reference other artists that mid-journey might have been trained on to take cues from their style.
- This is one of the biggest controversies in AI art, as it can be seen as theft or plagiarism.
- However, there is a safe way to use those cues as minor influences into your own unique style.
Understanding Style Influences
In this section, the speaker discusses the various influences that can impact one's image and style choices.
Style Influences
- There are many influences that can impact one's image and style choices.
- The speaker has other videos on their channel that list different style influences.
- The speaker shows an example of how a Gothic Cathedral painting influenced the subject of their creation.
- The speaker demonstrates how to use style fusion to combine different styles, such as surreal city scenes and Renaissance Gothic painting.
Iterating with Style Fusion
In this section, the speaker discusses how to iterate with style fusion to create unique images.
Using Style Fusion for Iteration
- The speaker demonstrates using style fusion to combine surrealism with hyper-realistic 3D renderings.
- When iterating with style fusion, it is important to change as few variables as possible each time in order to better navigate towards the desired image.
Setting up a Private Server for Mid-Journey
In this section, the speaker explains how to set up a private server for Mid-Journey and organize it into categories and channels.
Creating Channels
- Use dashes or underscores for spaces when creating channels.
- Create channels for non-Mid Journey related stuff to keep everything in one place.
- Invite the bot to your server by clicking on its name and selecting "Add to Server".
- Once the bot is added, create channels for different things you'd like to do.
Using Threads
- Create threads within channels to keep conversations organized.
- Threads are independent conversations that are still on theme for the channel you're in.
- Threads will automatically archive after a couple of days but can still be accessed by clicking on them.
Bonus Tip
- When using reference images or variations on an existing image, you're beholden to the original aspect ratio.
Understanding Mid-Journey Image Generation
In this section, the speaker explains how to access and manage images generated using Mid-Journey.
Accessing Generated Images
- All images generated using Mid-Journey are stored in the user's account on midjourney.com.
- Users can sort their images by popularity, age, or other criteria.
- Users can view the details of each image and copy its prompt or command for reuse.
- Users can open an image in Discord or retrieve its job ID for further manipulation.
Using Reference Images
- Users can use one or more reference images to guide the color and composition of their generated image.
Post-Apocalyptic City
In this section, the speaker discusses how to generate variations of an image prompt using image weighting and changing aspect ratios.
Adhering to Original Image Prompt
- The design adheres heavily to the original image prompt in terms of composition, design language, and colors.
- The clown aspect has not been given much weight yet, except for a little bit of clown action in number four.
Image Weighting
- Image weighting is used to tell the system how much to focus on any particular element of the prompt when generating variations.
Changing Aspect Ratio
- Changing the aspect ratio can be done by generating a version with the correct aspect ratio that you want.
- To change from 2x1 to 4x3 aspect ratio, create a new Photoshop document with 1440x1080 resolution and paste your image into it. Use content-aware fill to avoid solid bars on either side.
Using Magic Wand Tool in Photoshop
In this section, the speaker demonstrates how to use the magic wand tool in Photoshop.
Using Magic Wand Tool
- Use the magic wand tool over here on the left select our two blank areas so hold shift to select the second one then we're just going to do edit content aware fill Photoshop has all these AI content aware tools that allow you to manipulate images a lot easier that's part of what you're paying for with those crazy subscription compared to other applications.
- It allows you to manipulate images more easily and includes AI content-aware tools.
Introduction to Aspect Ratios
In this section, the speaker introduces aspect ratios and explains why they are important for generating images for different purposes.
Importance of Aspect Ratios
- Different types of images have different aspect ratios, such as 3:2 or 2:3 for still photos from a mirrorless or DSLR camera.
- Using a square image with a 1:1 aspect ratio is perfect for social media platforms but not useful for posters, videos, or wallpapers.
- Taller aspect ratios are better suited for shirt designs while wider ones work well for posters and cinematic prints.
- The aspect ratio heavily contributes to the composition cues that mid-journey takes.
Using Aspect Ratios in Mid-Journey
- To use an aspect ratio in mid-journey, it is one of the parameters added at the end of a prompt using dash AR Space followed by the desired ratio (e.g., dash AR Space 9 by 16).
- Mid-journey tries to fill out the frame based on the given aspect ratio.
Mid-Journey Settings
In this section, the speaker discusses the various settings available in Mid-Journey and how they affect the quality and stylization of generated images.
Quality Settings
- The quality setting affects the speed at which images are generated and their final quality.
- The default buttons for quality provide options for 0.5, 1, and 2.
- Higher quality settings result in better image renders but use up more credits.
Stylization Settings
- Stylization determines how much Mid-Journey injects its own creativity into an image.
- Medium is the default setting, which adheres more to user prompts.
- Very high stylization goes super-stylized for everything that you do.
Other Settings
- Users can reset settings to defaults at any time.
- Public and stealth mode allow users to control what is displayed on their profile page.
- Remix mode allows users to modify variations within a prompt window.
- Fast versus relaxed mode affects how quickly images are generated and credits used.
Using Seamless Texture Checker
In this section, the speaker demonstrates how to use the Seamless Texture Checker tool to check if patterns are seamless. They also discuss upscaling images and its impact on tiling.
Checking for Seamlessness
- The Seamless Texture Checker tool allows users to check if their patterns are seamless.
- Users can drag an image onto the tool and zoom in/out to see if there are any seams.
- If there are small details on the borders of tiles, a seam may be visible when printed.
Upscaling Images
- Gigapixel can be used to upscale images, but it may break some of the finer details in tiling.
- While upscaling an image, it is important to check if it still looks okay using the Seamless Texture Checker tool.
Understanding Seeds
In this section, the speaker discusses seeds and their importance in generating AI art.
What Are Seeds?
- Seeds refer to a reference noise pattern used by AI algorithms to generate images.
- Gaussian noise patterns are used as a starting point for generating images based on prompts given by users.
- Machine learning training helps improve results over time.
Obtaining Seeds
- Mid Journey's website allows users to obtain seeds for their own generated images.
- Previously, seeds were available for all generated images but have since been removed due to concerns about image theft.
V4 and Photoshop
In this section, the speaker discusses using Photoshop to create a layer mask that hides everything except for the VR headset. They also explain how to refine selections using a layer mask.
Creating a Layer Mask
- Lower the layer opacity to see where the mask should go.
- Create a layer mask by clicking the button.
- Use the black brush to hide parts of the image. White shows through, black hides.
Refining Selections with Layer Masks
- Using a layer mask allows for easier refinement over time compared to erasing.
- Continue showing and hiding over time instead of undoing an erase with control z.
Adding Googly Eyes
- Instead of hoping for mid-journing to come up with googly eyes, use Google Images for reference images.
- Export as PNG and save in an organized folder before dragging into Discord Channel.
Making Variations on Upscale AI
The speaker discusses making variations on Upscale AI and how it sticks too closely to original goggles even with modified images.
Making Variations on Upscale AI
- Making variations on upscale AI can be difficult when it sticks too closely to original goggles even with modified images.
- Try making variations on V4 itself or try original prompt without remixing at all specified.
Goggles and Stylization
In this section, the speaker talks about using stylization to develop a plain-looking image into a more stylized one over time. They also discuss adding chaos to give mid-journey more leeway to vary away from your prompt.
Stylization and Chaos
- Stylization starts with a plain-looking thing that develops into a more stylized look over time.
- Copying the prompt as before with the same seed and everything, but this time adding chaos which is just randomness.
- Chaos is basically a percentage from 0 to 100.
- Chaos level of 25 changes the dog type and adds different elements, such as black bars on some images.
- At 75 chaos level, things are pretty much out of control. The style on number three is incredible with the gradient on the goggles.
- Full 100 chaos level is similar but you will get very little else that adheres to your composition desires or references.
- Using Max stylization and Chaos works best on V4 for generating super abstract prompts.
Permutations Feature
In this section, the speaker discusses how to use permutations feature which allows you to generate multiple images at once from your prompts.
Permutations Feature
- You can use these with the permutations feature which allows you to generate multiple images at once from your prompts.
- Permutations are an awesome feature that helps find inspiration or finding the next step for what you need to do.
- Feeding one word "wonderful" with a Max stylized and Max chaos rating gave four completely different images.
Introduction to Different Versions of DALL-E
In this section, the speaker introduces different versions of DALL-E and their capabilities.
DALL-E V4 and V5
- DALL-E V4 struggles with hands while V5 is better with hands and more photorealistic by default.
- Users can experiment with running the same prompt through different versions to see which one they prefer.
- People had fun feeding abstract phrases or song lyrics in mid-Journey V2 and V3 because it was so abstract and non-specific.
Niji Journey
- Niji Journey is an anime version of DALL-E that users can use to create anime-style images.
- Users can join a dedicated server for Niji Journey or use normal mid-journey with the "--niji5" or "--niji4" parameter to generate prompts with that model.
Generating Anime Style Images
- Users can generate anime style images using all the same techniques learned about mid-journey but specifically catered towards anime instead of photorealism or painting.
- The niji journey model has a "--style" parameter with two options that users can add into it.
Generating Anime Style Images with Mid-Journey
In this section, the speaker discusses how to generate anime-style images using Mid-Journey. They explain the different styles available and how to use them.
Using Expressive and Scenic Styles
- The speaker explains that they will be generating a cyberpunk dog image using the seed generated in the previous section.
- The speaker explains that there are two styles available: Expressive and Scenic. Expressive is better for character portraits while Scenic is built more for getting wallpapers out of mid-journey.
- The speaker notes that they have seen people on the Niji Journey server using Scenic with portraits, but it doesn't do much in that regard.
- The speaker generates an image with both styles enabled and notes that Expressive is better for character portraits while Scenic has a more wallpapery aesthetic.
Generating Anime Style Wallpapers
- The speaker references an older prompt where they created a landscape image in a Miyazaki style. They explain how to make it widescreen by changing the aspect ratio to 21:9.
- The speaker generates some anime-style wallpapers using both styles. They note that while they're not perfect, they're still pretty cool.
Describing Images
- The speaker explains that Mid-Journey now has a describe feature that allows you to generate prompts from an image. This can be useful if you see an image from someone else and want to know how to make it yourself.
Prompt Helper
In this section, the speaker introduces a free tool called "Prompt Helper" that generates prompts for users based on their specifications. The tool allows users to specify various parameters such as style, lighting, camera type, and aspect ratio.
Using Prompt Helper
- Prompt Helper is a free tool that generates prompts for users based on their specifications.
- Users can upload an inspiration image and start typing their main idea.
- Users can specify various parameters such as style, lighting, camera type, and aspect ratio.
- Users can also specify things they want to avoid in the prompt.
Image Weighting
- Waiting is the ability to manipulate your prompt based on telling it which elements are more or less important.
- Users can use colons and numbers to indicate how important each element is in the prompt.
- Image weighting is another parameter that heavily considers image references when generating prompts.
- Users can use dash dash IW followed by a number between 0.5 and 2 to set the image weight of an element.
Permutations and Blending Images
In this section, the speaker discusses how to use permutations and blending images to generate different landscapes.
Using Permutations
- The speaker explains that they will generate four grids based on different landscape ideas using permutations.
- They remove the image weight entirely from their permutation options to get better results.
- The speaker notes that by using permutations carefully, it can be very helpful in generating different landscapes.
Comparing Prompts with Different Versions of Mid-Journey
- The speaker shows how to compare prompts with different versions of Mid-Journey by using squiggles for separating things.
- They show the differences between version 1, 2, 3, and 5 of Mid-Journey in terms of style.
Blending Images Together
- The speaker talks about blending images together to generate even more unique results.
- They explain that you can blend any images by copying and pasting them into the blend command.
Prompting Tools
In this section, the speaker discusses various prompting tools that can be used to generate advanced prompts.
Multi-Prompting
- Multi-prompting is a powerful tool that combines multiple prompts into one.
- Each individual prompt should get you part of what you want ahead of time because otherwise, you're just throwing a ton of extra descriptions at mid-journey and you don't know what it's going to come up with.
Reference Images
- Reference images can be added to the prompt for better accuracy.
- Pre-processing reference images using Affinity Photoshop or other software can help improve accuracy.
Additional Prompting Tools
- Using "versus" can create split-view images with different compositions on each side.
- The "no parameter" tool can exclude certain elements from the generated image.
- Emojis can also be used as prompts.
Advanced Prompts
In this section, the speaker demonstrates how to create more advanced prompts using various tools and techniques.
Glitch Aesthetic
- Increasing the weight of glitch aesthetic in a prompt generates more glitch art-like results.
Split View Images
- Using "versus" creates split-view images with different compositions on each side.
Emoji Prompts
- Emojis can be used as prompts for generating unique and interesting results.
Using Mid-Journey for Macro Photography and Logo Generation
In this section, the speaker discusses how to use Mid-Journey for macro photography and logo generation. They explain how to interpret prompts and emojis to get different results, as well as how to generate logos using Mid-Journey and vectorize them for better scaling.
Macro Photography with Mid-Journey
- Use the "microscope" prompt in combination with a subject to get macro shots.
- This is a fascinating way to interpret prompts and emojis, resulting in unique photos.
- You can take macro shots without having to specify it explicitly.
Logo Generation with Mid-Journey
- Search for "logo" or "logo design" in Explore to generate logos.
- Generated logos may not follow design rules perfectly but can be edited later.
- Vectorizing logos allows for better scaling without losing quality.
- Use vectorizer.ai website to convert images into vector art.
Topaz Apps and Other AI Art Resources
In this section, the speaker discusses various AI art resources that can be used to upscale images and create AI-generated art.
Topaz Apps for Upscaling Images
- Topaz Labs offers expensive apps like Gigapixel and Photo AI that use various AI algorithms to upscale images while maintaining detail and preserving faces.
- The speaker has dedicated videos on these apps already and has shown multiple upscaling workflows on their channel before.
Free Alternatives for Upscaling Images
- Chainer is a free app with a free upscaling algorithm.
- Big JPEG is the speaker's favorite online AI super res option that's completely free. Users can upload their images to make them bigger too if they need to upscale them for printing.
Upscaling AI Art for Printing
- The speaker has whole videos dedicated to multiple different ways you can upscale your AI art and clean them up to make them look nice for printing.
- They have printed giant posters, standard 8.5 by 11 prints, and even made apparel with their AI art that they've printed on shirts.
Following Other Artists Doing Cool Stuff with AI Art
- The speaker recommends following Josh Chap, an incredible photographer and director who experiments a lot with AI art.
- Josh Chap uses their work with photography to influence their AI generations, creating incredible styles with lots of photo realism because he blends his own defined style with his own photography.
- Nick St Pierre does a lot of 3D rendering stuff but also messes with prompting. They have a lot of threads on how you can explore styles and gain information from a journey.
Final Thoughts
- The speaker encourages viewers to take notes, take their time, and play around with AI art.
- They have lots of videos on their channel dedicated to walking viewers through the world of AI art and making the tech less scary so that they can get their ideas out as quickly as possible.