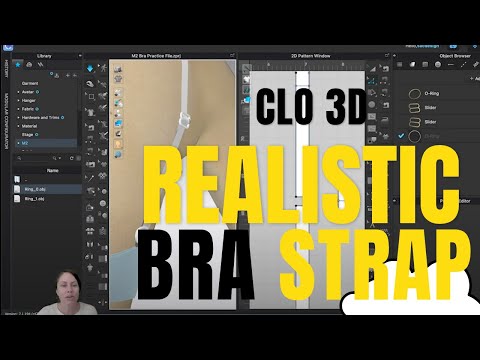
How to Make A Realistic Bra Strap in CLO
Creating a Bra Strap with Slider and Ring
Introduction to the Project
- The video focuses on creating a bra strap by adding a slider and a ring, emphasizing the learning of drafting tools.
- The tutorial is based on Khloe's 15-minute video, which serves as a faster reference; this video aims to provide a slower, more detailed breakdown.
Drafting the Slider
- To create the slider, it's recommended to trace over a photograph for accuracy. A basic rectangle will be used as the starting shape.
- The dimensions for the slider are suggested to be around one inch, while the fabric size is set at five inches by five inches for ample space.
Setting Up the Environment
- Users are guided to select views in their drafting software; closing unnecessary windows can help streamline workspace.
- Files needed for this assignment should be downloaded and organized within the library of the software for easy access.
Importing Images into Software
- Instructions are provided on how to import an image into the drafting software using specific tools designed for graphics.
- If issues arise with visibility after importing, changing settings from monochrome surface to front texture surface can resolve them.
Editing Graphics and Using Tools
- The edit tool allows users to manipulate imported graphics; recognizing icons like white arrows indicates editing capabilities.
- Rulers can be activated for precision in alignment; switching between selection and edit tools enhances workflow efficiency.
Tips for Effective Use of Software
- A mouse with a scroll wheel is highly recommended over trackpads for better navigation within the software environment.
- Students are encouraged to invest in affordable mice as they significantly improve user experience compared to trackpads.
Creating Fabric Patterns with Internal Lines
Using the Line Tool for Pattern Design
- The speaker introduces the line tool, specifically the polygon option, comparing it to Adobe Photoshop's pen tool, indicating its user-friendly nature.
- Demonstrates clicking and dragging to create curves using handlebars instead of multiple clicks, enhancing efficiency in design.
- Discusses aligning cursor under anchor points for precision in creating symmetrical shapes while drawing half of a pattern.
Tracing and Creating New Shapes
- The process involves tracing internal lines to form distinct pattern pieces; emphasizes selecting all segments by holding shift.
- Mentions a technique where inside and outside shapes are traced separately before layering them for visual clarity in fabric design.
Addressing Fill Issues in Designs
- Highlights common student concerns regarding fill issues with curved lines due to resolution settings affecting appearance.
- Explains how 3D software uses particle distance to wrap mesh around objects, impacting the quality of fills based on resolution settings.
Adjusting Particle Distance for Quality
- Introduces the concept of particle distance in 3D modeling, explaining its default setting and how it can be adjusted for better quality towards project completion.
- Demonstrates changing particle distance from 20 to 1, showcasing significant improvements in mesh alignment with design elements.
Finalizing Pattern Pieces
- Discusses cleaning up curves and deleting unnecessary pattern points to streamline designs before unfolding patterns.
- Describes challenges faced when selecting overlapping points and emphasizes the importance of distinguishing between internal line points and pattern points during editing.
3D Object Manipulation and Exporting Techniques
Selecting and Rotating Objects
- The speaker emphasizes the importance of selecting an object before rotating it to avoid losing orientation in 3D space. This tip is particularly useful for beginners.
Adjusting Thickness of Textured Surfaces
- A common issue arises when users attempt to increase thickness on a textured surface without having the view enabled, leading to confusion. Ensuring the view is turned on is crucial for accurate adjustments.
Property Editor Functionality
- The property editor dynamically changes options based on what is selected (e.g., background, pattern, or fabric). This feature highlights the necessity of selecting the correct item before making modifications.
Modifying Object Properties
- The speaker demonstrates how to increase the thickness of a selected pattern from zero to four, transforming it into a more substantial object resembling metal or plastic trim.
Smoothing Edges and Internal Lines Visibility
- To enhance aesthetics, edges can be smoothed using curvature settings. Additionally, internal lines used as tools can be hidden if they clutter the workspace.
Exporting 3D Models
Exporting as OBJ Files
- The process begins with exporting the modified object as an OBJ file. Users are advised to select "export obj" and name their files appropriately (e.g., "slider draft").
File Settings and Common Pitfalls
- Important export settings include ensuring that dimensions are set correctly (millimeters instead of meters), which prevents future complications during use.
Unzipping Files for Access
- After exporting, users must unzip their files to access them properly within their project folders.
Integrating Components in Design
Adding Sliders to Straps
- The next step involves integrating the slider into a strap design while ensuring that the strap length is adjustable for functionality.
Importing OBJ Files into Workspace
- Users are instructed on how to import their previously created OBJ file into their workspace by right-clicking and adding it as a trim first for better size management.
Adjustments and Tools Overview
Resizing Imported Objects
- When importing objects as trims, resizing may be necessary since they often appear too large initially.
Navigating Tabs in Software Interface
- Users should familiarize themselves with various tabs available in the software interface (e.g., buttons, stitches, UV maps), which provide different tools for design manipulation.
Slider Tool Usage and Settings Adjustment
Adjusting Scale and Units
- The user demonstrates how to import a slider draft and adjust its scale using a tool menu, highlighting two methods for resizing.
- The user expresses uncertainty about the scaling options, noting that measurements are in inches while the video uses millimeters, leading to confusion.
- Attempts to switch measurement units from inches to millimeters are made through settings, revealing a learning opportunity regarding unit preferences.
- After changing the unit system to millimeters, the user realizes they need to restart the file for changes to take effect.
- The user decides to revert back to inches due to personal preference for working with that measurement.
Rescaling and Gizmo Tool Utilization
- The user explores rescaling options again after reverting back to inches, attempting various methods including holding shift for proportional scaling.
- A focus on adjusting thickness is noted as the user continues experimenting with the scale tool while ensuring proper dimensions.
- Measurements are checked against desired specifications; however, there is frustration when adjustments do not yield expected results.
Exporting and File Management
- The process of saving work as an OBJ file begins; care is taken not to select unwanted elements during exportation.
- User navigates through file management options while preparing files for export, indicating some confusion over selecting patterns correctly.
Avatar Integration and Fabric Adjustment
Opening Files and Adding Avatars
- After exporting successfully, the user attempts opening the newly created avatar file within their workspace environment.
- Successful integration of the avatar into their project is confirmed as they manipulate its position relative to other components.
Property Editor Adjustments
- Users engage with property editor tools post-avatar addition; adjustments are made concerning proximity between fabric straps and avatars.
- Deleting unnecessary elements from the workspace is discussed as part of maintaining organization within their project setup.
Skin Offset Configuration
- Discussion shifts towards modifying skin offset amounts in order to prevent clothing designs from intersecting improperly with avatars.
- A significant reduction in skin offset value (from 3.0 down to 0.2), which allows closer fitting without overlap issues, is emphasized as crucial for design accuracy.
How to Adjust a Bra Strap in Pattern Design
Setting Up the Collision Parameters
- The discussion begins with adjusting collision parameters for design elements, specifically setting gravity effects around pieces to 0.2 for closer proximity.
Working on the Bra Strap Design
- The focus shifts to modifying the bra strap, which is currently too short and will eventually slide through a ring for adjustability.
Lengthening the Strap
- The speaker demonstrates how to extend the strap length by clicking at a specific point where it meets the slider, using visual aids like blue dots on a 2D pattern.
Splitting and Drawing Internal Lines
- A keyboard shortcut (X) is used to split lines on the pattern piece, allowing for more precise adjustments. This involves adding points and drawing internal lines across segments.
Creating New Strap Dimensions
- The dimensions of the new strap are established as 3.332 inches in length and 0.35 inches in width, emphasizing careful measurement during pattern drafting.
Arranging Points and Pinning Techniques
- Arrangement points are activated to position the strap correctly on an avatar model; pinning techniques are introduced to stabilize components during movement.
Sewing and Simulating Movement
- The process of sewing straps together is described, ensuring they do not twist during simulation. Adjustments are made for better alignment before testing movement dynamics.
Fine-Tuning Particle Distance and Collision Settings
- Particle distance settings are adjusted to enhance detail accuracy in simulations; collision settings are also modified from 2.5 to 0.2 for improved interaction between elements.
Folding Tool Introduction
- An introduction to using a folding tool is provided, demonstrating how it can be applied effectively while managing pins within the design context.
Final Adjustments Before Simulation
- Final adjustments involve rotating elements into place before simulating their behavior; attention is given to ensure everything aligns properly before running tests again.
This structured approach captures key insights from each segment of the transcript while providing timestamps that facilitate easy reference back to specific parts of the video content.
Creating a Loop in Fabric Simulation
Setting Up the Fold Line
- The speaker discusses measuring and marking half an inch to create an internal line, which will serve as a fold line for sewing.
- The internal line is intended to connect two parts of the fabric, forming a loop when sewn together. The speaker selects this line using the fold tool.
Sewing Process
- There is uncertainty about whether to fold right sides or wrong sides together; however, the speaker decides to proceed with sewing after adding another internal line.
- The segment sewing tool is used to connect the top internal line with the bottom edge, and pins are added for stability during simulation.
Adjusting Particle Distance
- Before attaching the fabric piece to a slider, it’s noted that the particle distance of the strap has been reduced from three to one, making it significantly smaller.
- Selection tools are employed to manipulate and position elements accurately within the 3D window.
Positioning Challenges
- The speaker encounters difficulties selecting specific parts of the mesh and adjusting their positions relative to other components like sliders.
- Pins are deleted in an attempt to simplify selection and movement of fabric pieces; there’s concern about maintaining control over adjustments.
Final Adjustments and Simulations
- After several attempts at positioning, adjustments are made again using selection tools. A successful simulation occurs after ensuring all elements are correctly aligned.
- The final steps involve setting properties for a fold line at 360 degrees before simulating again. Internal lines on outer straps are deleted as part of cleanup before further simulations.
Creating a 3D Ring in Design Software
Initial Setup and Simulation
- The speaker begins by unsimulating the design to view changes made with the slider, expressing excitement about the visual outcome.
- They discuss adding pins to stabilize the design before introducing a ring, emphasizing the importance of preventing movement during adjustments.
Adding Pins and Creating the O-Ring
- The speaker places additional pins for stability on both sides of the design, indicating that these will be removed later.
- They attempt to use an existing trim for creating an O-ring but encounter issues with visibility and functionality, deciding instead to create a new trim as an avatar.
Drafting and Measuring
- The process shifts to drafting a circle using pattern tools; they note having straps available for reference.
- Before finalizing dimensions, they measure existing elements (0.35 inches), contemplating whether their new trim should be slightly smaller.
Adjusting Dimensions
- The speaker decides on starting with a quarter-inch size (0.25 inches), adjusting it based on visual assessment.
- They explore extending patterns through right-click options, trying different offsets until finding suitable dimensions for their design.
Finalizing Design Elements
- A baseline is established for reference; particle distance settings are adjusted to improve simulation accuracy despite potential slowdowns in performance.
- The speaker unlocks baseline lines from the artboard to convert them into internal lines necessary for cutting out holes in their design.
Reviewing and Refining Design
- After converting lines into internal ones, they attempt punching holes in the material while ensuring particle distance remains effective at one unit.
- Additional thickness adjustments are made based on previous settings (four units), along with curvature modifications noted from earlier video references.
Visual Assessment and Adjustments
- A 3D preview reveals that current designs resemble oversized shapes ("Cheerio"), prompting further refinement of thickness measurements.
- The speaker considers tracing methods for better accuracy in shape definition while experimenting with various offset distances until achieving desired results.
Conclusion of Design Process
- As adjustments continue, they focus on refining thickness again downwards from four units to two units based on visual feedback.
- Finally, arrangement points are activated to assist in locating specific patterns created throughout this detailed design process.
3D Modeling Adjustments and Exporting Techniques
Initial Adjustments to the Model
- The speaker discusses resizing a model, attempting to adjust its width by retracting the outer edges slightly.
- After an unsuccessful attempt at resizing, they consider manually moving parts of the model and express a desire for better tracing tools.
Exporting the Model
- The speaker prepares to export the model as an OBJ file, noting that this version contains multiple avatars and pattern pieces.
- Concerns arise about exporting without including necessary patterns; they decide to proceed with caution regarding what is included in the export.
Unzipping and Importing Issues
- Upon returning to their workspace, they find issues with data not being found when trying to add the exported avatar.
- They rename a pattern for easier identification before attempting another export, indicating a need for organization in their workflow.
Troubleshooting Export Problems
- The speaker realizes that previous naming conventions may have caused confusion during exports; they try renaming again.
- After correcting selections, they successfully prepare for another export but remain cautious about potential errors.
Finalizing Model Adjustments
- With successful imports underway, adjustments are made to particle distance settings on fabric pieces for better simulation results.
- They explore adding internal lines and elastic properties to enhance design durability but express uncertainty about whether these changes improve aesthetics.
How to Edit and Delete Pins in Simulation Mode
Steps for Editing and Deleting Pins
- The speaker initiates the editing process by using the "edit undo" command, indicating a focus on correcting previous actions.
- They mention hitting the space bar to stop an action, suggesting a user-friendly interface that allows for quick adjustments.
- The speaker describes selecting pins to delete, highlighting the importance of managing elements within the simulation effectively.
- They confirm their current mode as "simulation," which implies that they are working within a controlled environment designed for testing or demonstration purposes.
- The completion of making a bra strap is celebrated with enthusiasm, indicating satisfaction with the task's outcome.