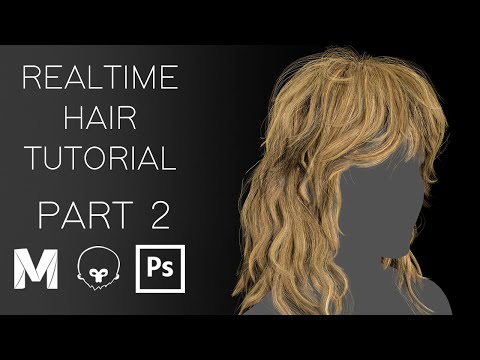
Realtime Hair Tutorial - Part 2 - Generating textures
Creating Hair Cards with XGen Interactive Groom
Introduction to XGen Interactive Groom
- The tutorial focuses on using XGen Interactive Groom in Maya, which is recommended for professional use.
- The end goal is to create hair cards that transition from thick to thin, culminating in flyaway strands.
Setting Up the Base for Hair Cards
- Begin by creating a plane as the origin for hair cards, ensuring a slight bend for a natural transition.
- Switch from Maya Classic to XGen Interactive Groom and generate interactive groom splines; set initial parameters like density and length.
Sculpting Hair Cards
- Direct manipulation of hair allows for freedom in styling; however, full hairstyles may be complex.
- Adding a taper at the ends of hair cards helps achieve a more natural look while adjusting width at the roots.
Reference and Adjustments
- Use reference images to guide the design process; aim for visually appealing base cards even if they won't be fully visible.
- Increase CV count to 50 for more control over shaping and add modifiers to refine clumps of hair.
Fine-Tuning Hair Appearance
- Utilize sculpt layers and tools like clump tool and noise modifier to adjust density and randomness in hair strands.
- Experiment with frequency and magnitude settings in noise modifiers to achieve desired effects on hair texture.
Achieving Natural Look
- Regularly check angles during sculpting to ensure natural appearance; avoid flatness in hair design.
Hair Grooming Techniques
Adding Layers and Clumps
- The process begins by adding another scope layer to create additional clumps, enhancing the visual interest through layers and shapes.
- Attention is given to gaps in the base layer; these should be minimized to avoid noticeable imperfections in the final look.
- Unique features should be avoided in early card stages as they will be repeated; any significant holes or irregularities can stand out.
Adjusting Hair Geometry
- Regular checks from various angles are essential for ensuring proper geometry and light interaction.
- Noise filters are applied to adjust hair texture; more noise is suitable for frizzy styles, while smoother looks require less noise.
- Focus shifts to tapering hair ends rather than leaving them blunt, which enhances realism.
Sculpting Techniques
- Two methods are discussed for achieving varied hair lengths: using a cut modifier with a mask or employing a length brush on sculpt layers.
- Care must be taken when applying length adjustments; it’s important not to overdo it across all sections of hair.
Enhancing Flyaways
- Interactive grooming allows for precise control over flyaway strands, making it easier to achieve desired aesthetics—whether chaotic or neat.
- A balance is sought between having some flyaways without overcrowding the base card, contributing to a natural appearance.
Finalizing Base Card Design
- Straight strands should be avoided as they detract from realism; variations help maintain a natural look throughout the design process.
- Additional noise modifiers can further break up uniformity in hair strands without manual adjustments, enhancing overall texture.
Creating Denser Layers
- After establishing the base card, two additional cards will be created that are denser but still less obvious than previous iterations.
Hair Card Creation Techniques
Initial Adjustments to Hair Cards
- The speaker discusses the importance of breaking up clumps in hair cards to avoid streakiness when repeating styles. Manual adjustments are made for a more natural look.
Building Layers for Hairstyle
- The next card is introduced to create interesting layers in the orc hairstyle, emphasizing that these base layers contribute significantly to the overall bulk and visual appeal of the hair.
Layer Density Considerations
- A distinction is made between using thicker base cards versus thinner individual cards, with thinner options preferred for a more realistic appearance from various angles.
Focus on Individuality in Hair Cards
- The speaker emphasizes creating individual hair cards that stand alone rather than clumping them together, as this enhances depth and realism in the hairstyle.
Managing Texture and Noise Levels
- There’s a discussion about managing noise levels in hair textures; too much noise can lead to an unappealing frizzy look when layered over other cards.
Importance of Detail in Hair Textures
- The speaker highlights the value of investing time into refining hair textures, noting that meticulous adjustments can greatly enhance the final appearance of hair geometry.
Geometry vs. Texture for Curly Hairstyles
- For curly hairstyles, it’s suggested to incorporate curls into textures rather than relying solely on geometry, which helps save resources while achieving desired effects.
Straightening Techniques for Hair Cards
- Adjustments are made to straighten bumpy sections of hair cards. A focus on maintaining straight lines is emphasized for this particular hairstyle style.
Control Over Length and Shape
- The speaker experiments with cutting techniques and manually lengthening ends for better control over the final shape of each card.
Reference Utilization During Creation
- Continuous reference checks are encouraged throughout the process to ensure that created cards align with desired effects and inspirations from existing styles.
Adapting Thickness Based on Style Needs
- It’s noted that varying thicknesses among individual cards can help achieve specific stylistic goals, allowing flexibility based on experience and judgment during creation.
Creating Standalone Hair Cards
Adding Interest to Hair Cards
- The speaker emphasizes the importance of minimal manual adjustments while focusing on adding noise to hair cards, suggesting a simple approach with a small manual clump in the middle.
Enhancing Visual Appeal
- The speaker plans to add more visual interest at the bottom of the hair card than usual, aiming for a bit more flair without overdoing it.
Considerations for Hair Card Length
- Acknowledges that for certain hairstyles, it's crucial to consider the length of hair cards; shorter styles may require longer cards for better texture and appearance.
Texture Management
- Discusses past experiences with hair card lengths and suggests making them longer to avoid stretched textures when transitioning from short to long styles.
Creating Flyaways
- The speaker mentions creating functional flyaway strands that contribute to the overall look rather than strictly adhering to reference images.
Using Hair Cards Effectively
Disguising Strands with Hair Cards
- The speaker explains using hair cards strategically to block out styles instead of relying on sculpting tools, which can lead to strange appearances initially.
Managing Density in Hair Cards
- Highlights a teaching moment regarding density changes in hair cards; improper adjustments can lead to uneven or lopsided results.
Manual Adjustments for Even Distribution
- Suggests manually adjusting density settings and removing excess strands by hand for better control over distribution and appearance.
Refining Flyaway Styles
Assessing Reference Needs
- The speaker reflects on needing additional flyaway strands based on reference images, indicating that these should have varying densities for realism.
Balancing Density in Flyaways
- Plans to create different flyaway hair cards with varied densities, avoiding overly sparse designs while ensuring they blend well into the hairstyle.
Final Touches and Variations
Creating Flyaway Cards for Hairstyles
Designing the Final Flyaway Cards
- The speaker discusses creating the last few flyaway cards, noting that while they will be similar in design, there will be slight variations in their shapes to suit different hairstyles.
Tips for Using XG Software
- The speaker emphasizes the importance of saving work incrementally when using XG software due to its potential instability. They share a personal experience of encountering corruption issues in the past, advising caution to prevent data loss.
Combining Strands for Specific Effects
- A recommendation is made regarding the combination of strands on one card; having three strands together while also including a singular strand can provide versatility. This approach allows for adjustments in styling, particularly for specific flyaway hairs.
Utility of Singular Strands