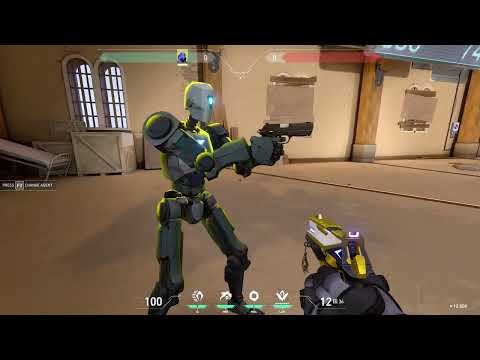
PROPER GUNPLAY HYGIENE WITH GOOD CROSSHAIR PLACEMENT
Proper Gunplay Hygiene and Crosshair Placement in Valorant
Introduction to the Video
- The video is an unscripted guide focusing on proper gunplay hygiene and crosshair placement as part of an aim training routine in Valorant.
- It aims to cover every weapon in Valorant, with additional content available on a secondary YouTube channel dedicated to coaching VODs and live streams.
Importance of Coaching Content
- The video will also be included in the rank playbook, emphasizing its relevance for players looking to improve their skills.
- The speaker recommends acquiring the playbook over private coaching for budget-conscious players, as it covers essential gameplay elements like angle clearing and utility usage.
Weapons Focused During Training
- Key weapons highlighted for practice include: classic pistol, ghost, sheriff, stinger, bulldog, guardian, phantom, vandal, marshall, and outlaw.
- The shorty is suggested as a bonus weapon due to its effectiveness in close-range combat; pro players often carry it as a secondary weapon.
Aim Training Routine
- A one-for-all aim training routine is linked in the description for comprehensive mechanical skill improvement.
- This routine addresses various mechanical problems that players may encounter while playing Valorant.
Classic Pistol Usage Tips
- Players should always move when using the classic pistol since it's forgiving with movement; static crouching should be avoided.
- Effective range for the classic pistol is between 0 to 20 meters; beyond this range results in significant bullet spread and inaccuracies.
Strategies for Long Range Engagement
- When engaging enemies at distances greater than 20 meters, focus on one-tap shots rather than spamming bullets.
- Maintain some mobility but prioritize accuracy by aiming for headshots when fighting at longer ranges.
Aim Training Techniques for Classic Pistols
Movement and Prediction
- Emphasizes the importance of mobility in aiming, suggesting players should move left and right while predicting enemy movements.
- Discusses a one-for-all aim training routine that includes practicing dead zone shots while moving to maintain accuracy.
Shooting Strategies at Varying Distances
- At distances of 5 to 20 meters, recommends using either single taps or two consecutive shots before making a footstep for better accuracy.
- Highlights the effectiveness of burst fire with classic pistols at close range (0 to 5 meters), advocating for quick follow-up shots after initial hits.
Close Range Combat Techniques
- Suggests using a triple shot followed by rapid left-click firing to maximize damage in close-range encounters.
- Advises against excessive spamming of burst fire, as it can lead to randomness; instead, focus on precise shooting.
Aiming Precision and Timing
- Warns against taking shots without proper aim, especially when executing triple shots; emphasizes confirming crosshair placement before firing.
- Encourages players to take their time aiming around the enemy's neck level for higher chances of success in close combat situations.
Mastery of Classic Pistols
- Reiterates the significance of mastering classic pistols due to their power and utility in early rounds of gameplay.
- Stresses the need for strategic movement during deathmatches to avoid long-range engagements and prioritize closer fights.
How to Improve Your Shooting Precision in Valorant
Movement Techniques for Long Ranges
- In Valorant, when engaging at long ranges, avoid wide movements; enemies only need micro adjustments to aim effectively.
- Minimize movement; if you must move, use wider strafes (A and D keys) rather than small side steps which are ineffective at long distances.
Strategies for Close Range Engagements
- For distances of 0 to 20 meters, maintain mobility between shots by strafing left and crouching; practice rapid firing techniques.
- Focus on raw precision with the Ghost pistol, utilizing the dead zone mechanic while moving left and right. Engage primarily within a range of 10 to 20 meters.
Effective Use of the Ghost Pistol
- Avoid using the Ghost beyond 30 meters due to damage drop-off; prioritize headshots for maximum effectiveness.
- Take your time confirming targets before shooting; two well-placed shots can eliminate an enemy quickly.
Mastering the Sheriff Pistol
- When practicing with the Sheriff in deathmatch scenarios, focus on tracking targets and ensuring high accuracy (above 80%).
- Avoid panic shooting; instead, aim for one precise headshot rather than spraying bullets indiscriminately.
Positioning and Shot Selection
- Maintain positioning below 30 meters when using the Sheriff to ensure one-shot kills with headshots.
- In early rounds, consider body shots against low-health enemies as they can be effective without needing headshots.
General Tips for Engaging Enemies
- Always opt for body shots against low HP enemies when cover is available; this can lead to easier eliminations.
- Emphasize raw precision during engagements—aim for an 80% headshot accuracy rate. Don't rush your shots or spam fire unnecessarily.
Weapon Mastery in Valorant: The Importance of the Stinger
Combining Weapons Effectively
- Emphasizes the importance of combining weapons, particularly using the Shorty alongside other firearms during eco rounds and on long-range maps.
- Highlights that mastering shotguns like the Shorty is crucial, but they are not recommended as primary weapons in deathmatch scenarios.
Advantages of the Stinger
- Argues that the Stinger outperforms the Spectre due to its lower time to kill and user-friendliness, making it a better choice for eco rounds and saving money for future rounds.
- Recommends using the Stinger as a primary anti-co weapon across most agents and maps, emphasizing its significance in gameplay strategy.
Burst Fire Technique
- Advises players to utilize burst fire when engaging enemies at distances greater than 20 meters, aiming for one or two shots to eliminate targets effectively.
- Instructs players to pull their crosshair downwards while firing bursts since bullets tend to rise leftward; this technique is essential for accuracy.
Combat Strategy with Stinger
- Suggests waiting until all four bullets from a burst have fired before moving laterally; premature movement can lead to inaccurate shots.
- Encourages committing fully to fights when using the Stinger, either by crouching after initial shots or maintaining aggressive aim control.
Efficient Use of Automatic Fire
- Warns against inefficient burst firing within close ranges (0–20m), advocating instead for automatic fire aimed at headshots for quick eliminations.
- Discusses how controlling spray through aggressive downward mouse movements can enhance effectiveness in combat situations.
Mastering Timing and Recoil Control
- Urges players to focus on timing their shots, especially regarding recoil management after firing six bullets; improper control leads to missed shots.
- Reinforces that isolating one-on-one gunfights is key when using the Stinger due to its limitations against multiple opponents.
Combat Strategies in Gunfights
Efficient Use of Bullets
- Fighting multiple enemies is inefficient; if it takes more than 10 bullets to kill one enemy, the remaining bullets may not suffice for another.
- Isolate enemies for one-on-one gunfights within a range of 0 to 20 meters for optimal efficiency.
Weapon Recommendations
- After achieving five kills with a Stinger, switch to the Bulldog, which is considered an optimal anti-economy weapon.
- The Bulldog is effective at all ranges (close, medium, long) and can kill with one headshot and one body shot.
Combat Techniques with the Bulldog
- Engage enemies between 0 to 15 meters primarily using hip fire while maintaining mobility through strafing patterns.
- Utilize unpredictable movement patterns (e.g., left-right crouching) to confuse opponents and avoid being targeted effectively.
- If you land a headshot at long range, follow up with a body shot instead of attempting consecutive headshots for efficiency.
Burst Fire Mechanics
- For engagements above 15 meters, utilize burst fire effectively by ensuring all three shots are fired before moving to maintain accuracy.
- Control recoil slightly downwards when aiming around the enemy's neck level during burst fire engagements. Aim for precision rather than rapid firing.
Transitioning to Other Weapons
- When transitioning to the Guardian after practicing with the Sheriff, focus on taking your time before shooting and aim primarily for headshots—aim for at least four out of five shots being headshots during gameplay.
- In ranges above 20 meters, use ADS (Aim Down Sights) for increased precision while engaging from various angles (tight or common). Ensure side-stepping between shots to remain unpredictable as a target.
Combat Strategies for Different Weapons in Valorant
Effective Use of the Phantom
- When engaging enemies at close range (0 to 5 meters), fully commit by spraying and crouching to reduce bullet spread and improve accuracy, aiming primarily for headshots.
- For medium ranges (10 to 30 meters), utilize burst fire with three shots while incorporating movement; avoid erratic movements that can hinder aim.
- In long-range engagements or when holding tight angles, use Aim Down Sights (ADS) and focus on burst firing rather than continuous spraying, especially against shielded opponents.
- If you hit an enemy but don't secure a kill, switch to body shots instead of risking missed headshots; this increases your chances of eliminating them quickly.
- Spamming through walls or smokes is often effective; however, be cautious not to expose yourself unnecessarily.
Transitioning from Phantom to Vandal
- The Vandal requires a different approach: avoid committing fully to sprays. Instead, limit your shots in close-range fights and maintain control over recoil.
- Stick to shooting in intervals of three bullets; after the third shot while ADSing, recoil becomes unpredictable and difficult to manage.
- During practice sessions like death matches, focus on minimizing wasted bullets—aim for accuracy within the dead zone or when stationary.
Utilizing the Marshall Effectively
- In open fights without cover, prioritize headshots with quick scopes when surprised by enemies; this enhances your chances of securing kills swiftly.
- While clearing angles during gameplay, consider using hip fire for better accuracy if caught off guard rather than relying solely on scoped shots.
- Develop a strong sense of hip fire accuracy with the Marshall as it can yield favorable outcomes even against full HP enemies.
Effective Sniping Techniques in Gameplay
Mastering Movement and Engagement
- When peeking with snipers like the Marshall, maintain momentum by engaging enemies quickly rather than standing still. This approach enhances speed and effectiveness during engagements.
- While reloading the Marshall, players should remain mobile. Utilize side crouch steps to avoid being an easy target during reload animations.
- Avoid standing still while waiting for a shot; this is detrimental. Instead, keep moving to maintain a tactical advantage over opponents.
Damage Strategies and Weapon Utilization
- In eco rounds or when enemies lack armor, focus on body shots with the Marshall to maximize damage output. Two consecutive body shots can be effective against armored opponents as well.
- Accumulating damage is crucial; even if you die after dealing significant damage (e.g., 505 damage), your teammates can capitalize on weakened enemies for easier kills.
Timing and Accuracy with Snipers
- Understanding the dead zone mechanic of snipers is essential. The center dot indicating accuracy appears late, so players should learn to shoot accurately before it shows up.
- Develop timing skills for sniper accuracy since there’s a brief window (0.3 seconds) where players can hit accurate shots without visual confirmation from the scope's dot.
Outlaw: A Powerful Anti-Capeon Weapon
- The Outlaw is recommended for purchase in rounds where opponents have limited credits (less than 3,800). It excels against unshielded enemies or those with light shields.
- Focus on body shots when facing singular enemies; two body shots are often sufficient for elimination unless multiple targets are present.
Reloading Strategy and Movement Techniques
- Prioritize reloading one bullet when possible since it takes about 2 seconds compared to 3.8 seconds for two bullets—this downtime can leave you vulnerable if not managed properly.
- Apply movement techniques similar to those used with the Marshall while using the Outlaw. Strafe or crouch between shots instead of remaining stationary to enhance survivability during engagements.
How to Master Weapon Mechanics in Valorant
Understanding Recoil Control
- When firing the first bullet, your crosshair will always return to the same vertical line; focus on maintaining horizontal aim for effective tracking of enemies.
- Engage recoil control only when fighting elevated enemies; otherwise, prioritize consistent shooting and strafing for better accuracy.
- In 1v1 situations, two body shots are often sufficient to secure a kill, especially in lower ranks where players may not react quickly enough.
Effective Angle Holding
- While holding angles with weapons like the Marshall and Outlaw, applying damage (140, 280, or 420) is sometimes more beneficial than aiming for headshots.
- If multiple enemies are low on health (e.g., 10 HP), finishing them off with a pistol can be more efficient than risking missed headshots.
Utilizing Shotguns Effectively
- The Shorty is crucial during deathmatches; mastering shotguns enhances gameplay significantly in close-range encounters.
- Use the Shorty effectively by engaging at close range (0 to 5 meters); it can eliminate enemies with one body shot if aimed correctly.
Precision and Timing with Shotguns
- Take your time before shooting; ensure your crosshair aligns perfectly with the enemy's torso for maximum effectiveness.
- Avoid premature shots that could lead to reload scenarios while exposed; patience is key in shotgun engagements.
Mastering Different Shotgun Types
- Hold angles crouched to reduce bullet spread and increase hit probability in close-range fights.
- Each shotgun has its optimal range: the Shorty excels at 0 to 5 meters. Maintain mobility while using shotguns for better performance.
Bucky Usage Tips
- Remember that right-clicking with the Bucky should be reserved for extreme situations; otherwise, opt for a classic pistol when facing distant threats.
Shotgun Strategies in Valorant
Understanding Shotgun Ranges
- The effective range of a Bucky is approximately 0 to 10 meters, where it can deliver devastating damage with just two body shots or one headshot.
- Shotguns like the Bucky allow for aggressive playstyles without movement inaccuracy, making positioning crucial when engaging enemies within this range.
Utilizing the Judge Effectively
- The Judge operates similarly to the Bucky but can be effective at slightly longer ranges (up to 15 meters), allowing for kills with two shots.
- Proper crosshair placement is essential; aiming at head level increases the likelihood of securing quick kills.
Common Mistakes with Shotguns
- Players often make positioning mistakes that can lead to easy deaths, especially when using shotguns like the Bucky and Shorty.
- A critical tip for using the Judge is not to spam shots. Instead, players should take their time between shots to reset recoil and bullet spread.
Engaging Enemies Correctly
- When engaging enemies, players should avoid holding down fire continuously as it increases bullet spread and reduces accuracy.
- Jumping towards enemies while firing helps close gaps effectively and allows for better chances of landing successful hits.
Positioning Tips for Success
- Players should always aim to jump towards enemies from angles that minimize exposure while maximizing their own shooting opportunities.
- Holding angles diagonally disrupts enemy crosshair placement and counters their peeking advantages, enhancing survival chances during engagements.
Shotgun Strategies in Close-Range Combat
Effective Use of Shotguns
- One shot is often sufficient to eliminate enemies when positioned correctly, especially with shotguns in close-range scenarios.
- Anticipating enemy movements is crucial; holding angles while crouched and positioning your crosshair can increase hit accuracy against jiggling opponents.
- Placing part of the crosshair on the wall while aiming at torso level can enhance bullet penetration and kill potential.
Baiting Enemies
- A strategic approach involves baiting enemies with a secondary weapon (like a classic or sheriff), leading them to underestimate your firepower.
- After drawing out enemy utility, you can capitalize on their aggression by using shotguns effectively from advantageous positions.
Angle Holding Techniques
- When playing alone, consider taking initial shots with a classic or sheriff before switching to shotgun play for better results.
- Patience is key; wait for the right moment to shoot after baiting enemies and ensure you're prepared for close engagements.
Combining Weapons
- The synergy between shotguns and pistols (like the classic) enhances combat effectiveness; use pistols to draw fire before finishing off with a shotgun.
Weapon Practice Recommendations
- Practicing weapons like the Bucky and Judge in death matches may be inefficient due to their camping nature; focus instead on mastering shorty usage across various maps.
Understanding Other Weapons: Frenzy and Spectre
Limitations of Frenzy
- The Frenzy pistol is generally not recommended due to its inefficiency compared to other options; it sacrifices shield and utility without significant benefits.
Engagement Strategies with Frenzy
- In ranges above 15 meters, opt for burst firing (two-shot bursts); within 0–15 meters, controlled spraying may work but full sprays are risky.
Spectre vs. Stinger
- While the Spectre has its merits, it’s often overshadowed by the Stinger in terms of economy management and overall effectiveness in competitive play.
Weapon Mastery in Valorant
The Spectre: A Beginner-Friendly Weapon
- The Spectre's recoil is easy to control, making it accessible for players of all skill levels. Mastering other weapons first makes using the Spectre feel effortless.
- Similar to mastering Omen as an agent, once you become proficient with the Spectre, other agents may seem less engaging.
Understanding the Operator
- The Operator is a crucial weapon that should be utilized on every map and by every agent when opportunities arise.
- Practicing with the Operator can be inefficient in deathmatch modes; however, practicing with similar weapons like the Marshall helps improve skills relevant to using the Operator.
Crosshair Placement and Positioning
- Proper crosshair placement and positioning are vital when using the Operator. Players should focus on holding angles effectively.
- When clearing angles, it's important to alternate between scoping in and unscope to maintain visibility while aiming.
Engagement Strategies
- In close-range fights, use 1x zoom; for longer ranges, utilize double scope for better accuracy.
- Avoid engaging multiple enemies at once; instead, focus on one target at a time and ensure escape routes are available.
Limitations of Certain Weapons
- The ARS is considered niche due to its situational effectiveness; it’s not a priority weapon in most scenarios.
- While using weapons like Odin or ARS, players should commit fully during engagements but also know when to hip fire if enemies are close.
Practicing with Various Weapons
- Proficiency with weapons such as Odin requires practice primarily outside of deathmatch settings—unrated games or practice ranges are recommended.
- Holding tight angles while crouching enhances accuracy with Odin since it behaves like a laser when aimed correctly.
This structured summary provides insights into weapon mastery strategies within Valorant based on specific timestamps from the transcript.
Weapon Mechanics and Crosshair Placement in Valorant
Understanding Weapon Usage
- The speaker compares using certain weapons to a "kill turret" approach, emphasizing the importance of crouching, aiming down sights (ADS), and spamming shots.
- In combat against multiple enemies, players should incorporate body shots, jiggle peeks, and burst fire techniques for effective engagement.
Crosshair Placement Techniques
- Proper crosshair placement is crucial during fights; players should aim primarily for headshots when holding tight angles.
- When holding an angle, position the crosshair at the furthest possible peak of an enemy's movement to maximize kill potential.
Adjusting Crosshair Positioning
- Depending on the angle held and anticipated enemy movements, adjust your crosshair closer or further from walls to optimize shooting accuracy.
- If unsure about enemy positions (e.g., no footsteps heard), place your crosshair closer to the wall. Conversely, anticipate wide swings by positioning it further away.
Anticipating Enemy Movements
- For expected jiggle peaks or wide swings, set your crosshair two dots away from the wall for better tracking and quick adjustments.
- Placing your crosshair too close can hinder reaction time; wider placements allow for easier tracking of moving enemies.
Utilizing Jump Spots Effectively
- Players should prepare their crosshairs for jump spots when they notice enemies frequently jumping around corners.
- Practicing jump spot mechanics is essential in Valorant; it helps gather information before teammates engage in fights.
Importance of Information Gathering
- Jump spotting allows players to control engagements by preemptively identifying enemy positions without exposing themselves unnecessarily.
- In solo queue games with unpredictable team compositions, utilizing jump spots becomes vital due to lack of reliable recon abilities.
Conclusion: Training Routine Impact
- Following a structured training routine like "one for all" can significantly enhance mechanical skills within two months for players below Ascendant rank.
Improving Gameplay Mechanics in Valorant
The Importance of Raw Mechanics
- Players ranked from Ascendant to Immortal can significantly benefit from focusing on their raw mechanics, which are crucial for improving gameplay.
- Many players at the Ascendant and Immortal levels struggle with issues that prevent them from reaching Radiant, indicating a need for targeted practice routines.
- Adjusting the difficulty of practice routines—by increasing speed or complexity—can help players enhance their skills effectively.
Mindful Practice and Persistence
- Achieving Radiant rank is possible for anyone who remains persistent and engages in mindful practice while addressing bad habits.
- It’s essential to work on personal weaknesses and problems to facilitate improvement in gameplay.
Community Engagement and Resources
- Joining a Discord server can provide additional support and resources for players seeking guidance or having questions about gameplay.
- The speaker recommends obtaining a "rank playbook" available on their Discord, which contains valuable insights based on player reviews.
Future Plans for Content Creation
- There are plans to create comprehensive content covering every agent and map in Valorant over the next few years, aiming to assist players further.
- Information regarding private coaching services is also available, providing opportunities for personalized skill enhancement.