How to Repair a DEEP SCRATCH in Car Paint (DIY)
Introduction and Overview
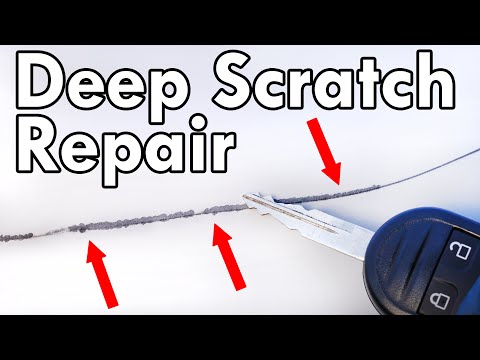
In this video, Chris Fix demonstrates how to repair a deep scratch in a car's paintwork using an automotive paint pen. He explains that while this method may not provide perfect results like professional repainting, it is a cost-effective solution for repairing scratches at home.
Repairing Deep Scratches with Automotive Paint Pen
- Using an automotive paint pen can help repair deep scratches inexpensively.
- This method may not achieve 100% perfect results like professional repainting.
- Sanding the entire panel and respraying would be the best way to repair deep scratches but comes at a higher cost.
- A body shop quoted $775 to fix the panel with the scratch professionally.
- The goal of this method is to achieve good enough results that are not easily noticeable from a distance.
Steps for Repairing Deep Scratches
Chris Fix outlines four simple steps for repairing deep scratches using an automotive paint pen.
Step 1: Clean the Panel
- Clean the entire panel to remove dirt and oils that could contaminate the scratch.
Step 2: Prep the Scratch
- Remove any rust and lightly sand the scratch to prepare it for painting.
Step 3: Apply Touch-Up Paint
- Use an automotive touch-up pen to fill the scratch with paint and add a layer of clear coat.
Step 4: Blend the Paint
- Use sandpaper and polish to blend the new touch-up paint into the original paintwork, making it less noticeable.
Tools and Products Needed
Chris Fix lists all the tools and products required for repairing deep scratches using an automotive paint pen.
- Isopropyl alcohol (70% or greater)
- Soapy water (dish soap and water)
- Razor blade and tape
- Microfiber towels
- Kitchen sponge
- 2000, 3000, and 5000 grit sandpaper
- Polish and polishing pad
- Automotive paint pen that matches the car's paint code
Choosing the Right Automotive Paint Pen
Chris Fix explains the features to consider when choosing an automotive touch-up paint pen.
- Ensure the paint pen has the base coat color you need.
- Make sure it includes automotive clear coat for better results.
- Check if the pen's tip is suitable for sanding deep scratches.
- Verify that the paint pen covers your car's specific paint code.
Finding Your Car's Paint Code
Chris Fix demonstrates how to find your car's paint code on the driver's side door jam sticker.
- Open the driver's side door and locate the door jam sticker.
- Look for a section on the sticker labeled "paint" or "paint code."
- The paint code is usually a combination of letters and numbers.
Choosing Between Paint Pens
In this section, the speaker advises viewers to choose the cheaper option between paint pens as they are essentially the same. They also mention checking for paint fade on older cars.
- The aftermarket makes OEM paint, so both paint pens are identical.
- Choose the cheaper option when buying a paint pen.
- Check for paint fade, especially on older cars.
Checking for Paint Fade
The speaker explains how to check for paint fade and suggests using items like a license plate or the area behind the fuel filler door to compare faded and protected paintwork.
- Over time, car paint will fade due to sun exposure.
- Use an item like a license plate that has been on the car since purchase to compare faded and protected areas of paintwork.
- Check behind the fuel filler door as well for comparison.
- Faded paint may show a color difference when compared to touch-up paint.
Drastic Example of Faded Paint
The speaker provides an example of drastic faded paint on taillight bezels of certain Mustang models.
- Taillight bezels on some Mustang models tend to fade quicker than other parts of the car's paintwork.
- This example shows a clear depiction of what faded paint looks like.
- It is better to have touch-up paint than leaving a noticeable gash in faded areas.
Understanding Layers of Car Paint
The speaker explains the different layers of car paint: panel, primer coat, base coat (color), and clear coat. They also discuss variations in thickness among manufacturers.
- Car's painted surface consists of multiple layers: panel, primer coat, base coat (color), and clear coat.
- Primer coat is usually gray and ranges from 10 to 40 microns thick.
- Base coat provides color and is also within the range of 10 to 40 microns thick.
- Clear coat layer, the thickest, protects the base coat and gives a glossy shine. It can be between 40 to 100 microns thick.
- Total paint thickness can vary from 60 to 180 microns due to different manufacturer spraying techniques.
Identifying Clear Coat Scratches
The speaker demonstrates how to identify clear coat scratches using alcohol on a rag. They explain that clear coat scratches are easier to repair compared to deep scratches.
- To verify if it's a clear coat scratch, wipe the scratched area with alcohol on a rag. If it disappears temporarily, it's a clear coat scratch.
- Clear coat scratches are easy to repair compared to deep scratches or paint transfers.
Repairing Deep Scratches
The speaker outlines the steps for repairing deep scratches, emphasizing the importance of cleaning and preparing the scratch before applying touch-up paint.
- Start by cleaning the entire panel with soapy water to remove oils, waxes, dirt, and debris.
- Ensure there is no rust in the scratch; if present, remove it using sandpaper or an abrasive tip on the paint pen.
- Smooth out sharp edges of deep scratches.
- Larger deep scratches require more effort for repair than smaller ones.
Timestamps have been associated with bullet points as requested.
Removing Sharp Jagged Edges
In this section, the speaker explains how to smooth out sharp jagged edges on a scratch using an abrasive tip on a touch-up pen and sandpaper.
Smoothing Out Jagged Edges
- Use the abrasive tip on the touch-up pen to sand the jagged edges of the scratch.
- Focus on smoothing out the edges without worrying about sending a little bit onto the clear coat.
- After sanding, wipe down the scratch with alcohol to remove dust and assess progress.
Feathering Out Sanding
- To create a smooth transition, use 800 or 1000 grit sandpaper.
- Fold the sandpaper over once to avoid sharp edges that can dig into the paint.
- Lightly fold it over again to create a rounded edge for sanding.
- The rounded sandpaper should fit nicely in the scratch, creating a smooth surface.
Checking for Completion
- Use your fingernail to feel if you can grab the edge of the scratch.
- If you can grab it, continue sanding to make it more rounded and smooth.
- The goal is to achieve a nice smooth transition without any sharp edges.
Prepping Narrow Deep Scratches
This section focuses on prepping narrow deep scratches by using an abrasive tip on a touch-up pen and keeping the sanding focused on top of the scratch.
Using Abrasive Tip and Sandpaper
- Start with an abrasive tip on the touch-up pen for narrow deep scratches.
- Set down both edges of the scratch at once due to its narrowness.
- Keep sanding right on top of the scratch without going too far off its sides.
Achieving Smooth Transition
- Ensure there is a nice smooth transition from primer to base coat and clear coat layers.
- Fill in and hide the scratch by adding touch-up paint to the smooth surface.
Checking for Sharp Edges
- After sanding, check for any remaining sharp edges.
- Smooth out any sharp edges to ensure a seamless finish.
- This step is crucial for achieving the best results in the touch-up job.
Painting with Touch-Up Paint
This section covers the process of adding touch-up paint to the smoothed-out scratch, emphasizing that it's okay to add slightly more paint than needed.
Preparing the Surface
- Wipe down the entire scratch, including its edge and surrounding area, with isopropyl alcohol and a towel.
- Ensure a perfectly clean surface free from oils, waxes, grease, dirt, and dust.
Applying Touch-Up Paint
- When applying touch-up paint, don't worry about adding too much.
- Allow the paint to overflow out of the scratch and be higher than the surrounding factory paint.
Summary
In this tutorial on removing scratches using a touch-up pen, several key steps were covered:
- Removing Sharp Jagged Edges:
- Sanding jagged edges with an abrasive tip on a touch-up pen.
- Feathering out sanding onto base coat and clear coat layers using folded sandpaper.
- Checking for completion by feeling if you can grab the edge of the scratch.
- Prepping Narrow Deep Scratches:
- Using an abrasive tip on a touch-up pen for narrow deep scratches.
- Focusing sanding on top of the scratch without going too far off its sides.
- Ensuring a smooth transition between primer, base coat, and clear coat layers.
- Painting with Touch-Up Paint:
- Preparing the surface by wiping it down with isopropyl alcohol.
- Applying touch-up paint generously to overflow out of the scratch.
These steps provide a comprehensive guide to effectively remove scratches and achieve a seamless touch-up job.
Applying Tape for Clean-Up
In this section, the speaker suggests using tape to make clean-up easier when applying touch-up paint. By surrounding the scratch with tape, it prevents touch-up paint from getting on the surrounding paintwork, reducing the need for touch-ups later.
Applying Tape
- The speaker recommends taping off the scratch to avoid touch-up paint getting on the surrounding paintwork.
- Taping helps with easy clean-up by simply removing the tape after finishing.
- The tape lines left after painting will be sanded down later, so they don't affect the final result.
Preparing for Paint Application
This section focuses on preparing for paint application after taping off the scratch. It includes shaking the paint well, removing excess paint from the brush, and applying thin layers of paint to achieve optimal results.
Shake and Prepare Paint
- Before starting, shake the touch-up paint container well.
- Unscrew the brush and remove excess paint by wiping it on the edge of the container.
Applying Thin Layers of Paint
- Start by applying very thin layers of paint to the top of the scratch.
- Gravity may cause some of the paint to drip down, so wipe off any excess drips.
- Work your way across the scratch from one end to another with thin layers of paint.
- Avoid going back over areas that have already been painted as it can disrupt drying and create an uneven surface.
Building Up Thin Coats of Paint
This section emphasizes building up multiple thin coats of touch-up paint to match and level with surrounding factory-painted areas. It also mentions that self-leveling properties in some paints help achieve a smoother finish during drying.
Building Up Coats
- Apply additional coats every five minutes or as needed until the touch-up paint is built up higher than the surrounding paintwork.
- The goal is to have more layers of paint than necessary to ensure it can be sanded down evenly later.
- Self-leveling properties in the paint help create a smoother finish during drying.
Final Touches and Tape Removal
This section covers the final steps of touch-up painting, including adding additional coats if needed and removing the tape carefully for a clean finish.
Final Coats and Tape Removal
- Apply a final coat if necessary to ensure the touch-up paint is thick enough to be leveled with the rest of the bodywork.
- After allowing the paint to dry for about 10 minutes, carefully remove the tape.
- To avoid damaging the touch-up paint, pull back on the tape at a 45-degree angle away from it while removing.
- Use a straight edge to lift any stubborn tape corners without damaging the touch-up paint.
Sanding for Blending
This section highlights sanding as a crucial step in blending and achieving a seamless finish between touch-up paint and surrounding areas. It mentions that even if initial brush strokes don't look perfect, sanding will result in a smooth surface.
Sanding for Blending
- After removing all tape, proceed with sanding to blend the touch-up paint with surrounding areas.
- Sand until it becomes level with the rest of the painted surface.
- Even if brush strokes appear visible initially, sanding will result in a smooth finish.
These notes provide an overview of key points covered in each section of the transcript. They are concise summaries that can assist others in studying or reviewing this content.
New Section
In this section, the speaker discusses the importance of using a small sanding block for touch-up paint and demonstrates how to sand away paint lines without damaging the surrounding clear coat.
Using a Small Sanding Block
- A typical size sanding block is too big for small touch-up areas.
- Find something like a domino to use as a small, flat surface for sanding.
- Wrap sandpaper around the domino to create a thin surface for sanding.
Sanding Technique
- Allow the touch-up paint to dry completely before sanding.
- Use the domino or small sanding block to sand back and forth along the scratch until it levels off with the surrounding paintwork.
- Be careful not to sand too much of the surrounding factory paint.
- Stop sanding once the scratch feels smooth and level with the rest of the panel.
New Section
In this section, the speaker demonstrates how to remove scratches by sanding down touch-up paint and achieving a smooth finish.
Sanding Touch-Up Paint
- For larger scratches, spray soapy water on the area before sanding to prevent gumming up of paint on the sandpaper.
- Continue sanding until all touch-up paint is level with surrounding paintwork.
- Check for any remaining bumps by running your hand across the panel. If bumps are felt, continue sanding until smooth.
Visual Inspection
- After completing initial sanding, visually inspect the entire scratch for any spots where touch-up paint may not look great or meet desired standards.
- Make necessary improvements before applying clear coat, as it becomes more difficult to fix after clear coat application.
New Section
In this section, the speaker addresses fixing imperfections in the touch-up paint before applying clear coat.
Fixing Imperfections
- If imperfections are noticed after sanding, fill them in with additional touch-up paint.
- Apply a thin coat of touch-up paint to the affected area and let it dry for 10 minutes.
- Wet sand the touch-up paint until it is level with the surrounding paintwork.
New Section
In this section, the speaker explains how to apply clear coat to the touched-up areas for a seamless finish.
Preparing for Clear Coat Application
- Wipe down the panel with isopropyl alcohol on a towel to remove any dust from sanding.
- Apply thin layers of clear coat, starting from one end of the scratch and working towards the other end.
- Ensure complete coverage of both touch-up paint and a slight overlap onto surrounding factory paint.
Final Clear Coat Application
- After allowing the first layer to dry for 10 minutes, apply a second thin layer of clear coat.
- Make sure that the entire scratch is covered in clear coat for smooth blending with surrounding clear coat.
New Section
In this section, the speaker demonstrates how to achieve a smooth finish by sanding and leveling out any ridges or unevenness in the applied clear coat.
Sanding Clear Coat
- Spray soapy water on the dried clear coat and use 800 grit sandpaper to sand down any ridges or uneven areas until they are level with surrounding clear coat.
- Progressively move up to 1500 grit and then 2000 grit sandpaper, wet sanding each time to further refine and feather out the sanded area.
The transcript does not provide information beyond this timestamp.
New Section
In this section, the speaker discusses the importance of ensuring a smooth panel surface and introduces the process of wet sanding and polishing to achieve a glossy finish.
Checking Panel Surface
- Run fingers across the panel to check for any divots, valleys, hills, or bumps.
- The panel should feel smooth without any imperfections.
Wet Sanding Process
- Wet sanding is done to fix any haze or unevenness on the panel's surface.
- Start with 3000 grit sandpaper and gradually move up to 5000 grit sandpaper.
- Use a sponge wrapped with sandpaper to avoid creating pressure points.
- Demonstration of how wet sanding can remove scratches and blend them into the panel.
Sanding with 3000 Grit Sandpaper
- Spray soapy water on the panel and sand it down using back and forth motions.
- Avoid circular motions as they can create circular scratches.
Sanding with 5000 Grit Sandpaper
- Repeat the process of spraying soapy water on the panel and sand it down with 5000 grit sandpaper.
- Ensure all areas are sanded evenly.
Polishing Step
- Apply polish on a buffing pad and spread it over the entire panel.
- Buff the polish into the panel using heavy pressure in a circular motion.
- The circular motion helps to make the clear coat glossy.
Final Result
- After polishing, use a microfiber towel to buff off excess polish.
- The result is a high gloss shine that blends in scratches effectively.
New Section
In this section, the speaker showcases the final result of the repair process and provides some additional tips for maintaining the repaired panel.
Scratch Repair Outcome
- The scratch that was initially visible on the panel is now completely gone.
- The repaired area looks smooth and glossy, blending in with the rest of the panel.
Scratch Visibility
- At certain angles or up close, a faint trace of the scratch may still be visible.
- However, from a distance of 5-10 feet, it becomes nearly invisible.
Protecting Repaired Panel
- It is advised not to apply wax or ceramic coating immediately after repairing.
- Touch-up paint can take up to 30 days to fully cure and harden.
- During this time, it is safe to drive the car and expose it to water but avoid sealing it with protective coatings.
New Section
In this section, the speaker concludes by summarizing the process of repairing deep scratches using touch-up pens and mentions its applicability for rock chips on bumpers.
Summary of Repair Process
- Touch-up pens are an effective solution for repairing deep scratches.
- Following the demonstrated process can yield impressive results.
Application for Rock Chips
- The same steps can be applied to repair rock chips on front bumpers caused by rocks kicking up.
Timestamps are approximate and may vary slightly.