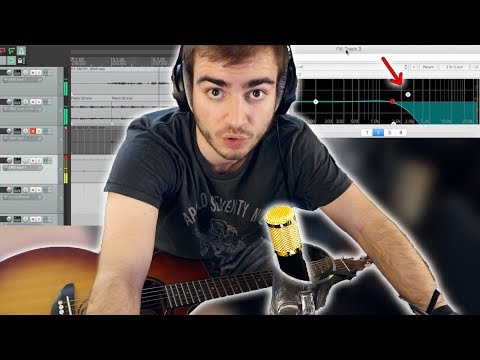
Aprendemos a grabar una canción desde cero. Este es el resultado. Tutorial Reaper | Jaime Altozano
🎹¿Quieres aprender a tocar el piano conmigo? https://www.musihacks.com/aprende-a-tocar-el-piano?utm_source=youtube&utm_medium=linkdesc&utm_campaign=organico&utm_content=aprendemosagrabarunacancindesd___BacNrKKPMsE 🎻¿Quieres entender la música clásica conmigo? https://www.musihacks.com/entiende-la-musica-clasica?utm_source=youtube&utm_medium=linkdesc&utm_campaign=organico&utm_content=aprendemosagrabarunacancindesd___BacNrKKPMsE Este es un tutorial muy básico y facil de cómo grabar una canción. Empiezo explicando conceptos básicos y acabamos con un ejemplo real de una canción que vamos grabando. Hablamos de pistas, ruteo de audio, grabar, editar, ecualizar y reverb, un poco por encima de todo. Para profundizar más en cada concepto están los tutoriales que habitan en maravilloso mundo de Youtube. Este tutorial es el 3/3 de la saga: -Cómo sonar a estudio con un micro de 20€: https://youtu.be/OBHkaXevhBc -Cómo sonar a estudio con una tarjeta de 30€: https://youtu.be/4Wp8X7MvGB0 EQUIPO QUE USO EN ESTE VÍDEO: ➳ El micro de 20€ Neewer NW-800: https://amzn.to/2QlZewJ ➳ Rode NT1-A es un micro más caro pero que suena mejor, no lo uso en este vídeo pero suelo utilizarlo: https://amzn.to/2MoKjP4 ➳ Tarjeta de sonido Behringer U-Phoria UM-2 (la han subido de precio de unos 30€ a 45€): https://amzn.to/2x74bkX ➳ La tarjeta que muestro en el vídeo es la Steinberg UR-22 (es más cara que la Behringer pero permite grabar en estéreo a teclados y suena un poquito mejor): https://amzn.to/2x4sVug Por si os interesa, he rearmonizado Hallelujah para la cover por darle un poco de vidilla. Los acordes en Do mayor (aunque yo en el vídeo la toco en Sib Mayor) son: C - Amaj7 - C - Amaj7 - Bbmaj7 - Gadd2 - C - Em C - Bbmaj7 - B - Fadd2 - Ab6#11 - Bb6 - E7 - Am Fmaj7 - Amaj7 - Fmaj7 - Ab - Bb - Cmaj7 🔴¿Quieres aprender a tocar el piano conmigo? 🔴 🎹 Mis cursos 🤓: https://www.musihacks.com/aprende-a-tocar-el-piano 🔍 Lista de Listas de Leitmotifs 🎭 más de 600 links para profundizar en la música de tus pelis, series, musicales y videojuegos favoritos: https://listadelistasdeleitmotifs.com 🎥 Mi Canal Secundario (donde hablamos de lah vidah): https://www.youtube.com/JaimeAfterdark ♫ MAS VÍDEOS MÍOS ♫ ╞Tutorial de Armonía Fácil: https://youtu.be/GUEUlw3rDEc ╞El Círculo de Quintas: https://youtu.be/BRBTCIK_9_g ╞La Verdad sobre la música POP: https://youtu.be/ySa67e0jKNA ╞La Verdad de la industria discográfica, los contratos de Kanye West: https://youtu.be/YmaLdu9LKg0 ╞Trap del Terraplanismo: https://youtu.be/ziJuNQcJn24 ╞Cómo sabe Shazam qué canción está sonando: https://youtu.be/OE4gcdjFbmc ╞Rosalía: Lo que nadie dice de El Mal Querer: https://youtu.be/NgHXFTgaVT0 ╞Interstellar: Un mito de Ruido y Silencio: https://youtu.be/2LyEpA4B9_o ╞Por qué Mozart no usaba el Si bemol: https://youtu.be/Jl5ki1JhPWk ╞Cómo empezar a hacer vídeos en Youtube: https://youtu.be/IWaC_hTumN8 ╞Todo Sobre Mí - Especial 1 Millón de Suscriptores: https://youtu.be/ScLPrOAbFKo ╞Mi Horrible Experiencia en el Sistema Educativo: https://youtu.be/ny61lc2xiZk 🟡 Instagram: https://www.instagram.com/jaimealtozano/ 🔵 Twitter: https://twitter.com/jaimealtozano 🟣 Twitch: https://www.twitch.tv/jaimeafterdark 🟠 Facebook: https://www.facebook.com/JaimeAltozanoPagina/ 🟢 Web: http://www.jaimealtozano.com 🎥 El Equipo que Uso (Cámaras, micros, tarjetas, etc): https://jaimealtozano.com/equipo-e-instrumentos/ 🔊 La Música que Uso en mis vídeos es de Epidemic Sound. Tenéis el primer mes gratis aquí: http://share.epidemicsound.com/Altozano
Aprendemos a grabar una canción desde cero. Este es el resultado. Tutorial Reaper | Jaime Altozano
How to Record and Edit Audio Professionally with Free Software
Introduction to the Video Series
- The video completes a series on affordable audio recording tools, starting with a €20 microphone and a €30 sound card, now introducing free software for professional-quality recording, editing, mixing, and exporting.
- The software discussed is not technically free but offers an infinite trial version that functions identically to the paid version. Users are encouraged to pay if they find it useful.
Understanding the Software Philosophy
- The marketing philosophy suggests that if users enjoy the program, they should pay €60 for a license; otherwise, they can continue using it for free indefinitely.
- The speaker emphasizes familiarity with various audio programs; understanding core concepts is more important than knowing specific software.
Setting Up Your Equipment
- A basic setup is demonstrated using an inexpensive microphone stand made from common household items.
- Instructions are provided on downloading and installing the software (Reaper), which prompts users to evaluate its features before purchasing.
Creating and Managing Tracks
- After installation, users set their audio device preferences in Reaper. They can create new tracks by inserting them into the project.
- Five tracks are created for different instruments (voice, piano). Each track has an "arm" feature that prepares it for recording.
Recording Process Explained
- Users must assign inputs from their sound card to corresponding tracks in Reaper. For example, input 1 is designated for the microphone.
- Options include mono or stereo recording; users select which input(s) will be recorded based on their setup.
Saving Projects Effectively
- When stopping a recording session, users are prompted to name their recordings and choose where to save them. It's recommended to create a dedicated folder for each project.
- Users can opt to copy all media files into this project directory while converting formats as needed (e.g., 24 bits).
Multi-Instrument Recording Techniques
- Once recordings are saved successfully in Reaper's project folder, playback of recorded audio is demonstrated.
- To record additional instruments like piano, connections via jack cables are shown. Stereo recording requires both inputs from the sound card.
Finalizing Recordings
- The process of arming another track for keyboard input is explained along with naming conventions for clarity during organization.
Understanding Audio Mixing Techniques
Introduction to Audio Control Features
- The speaker discusses the mute function, which allows isolating a specific track while muting others. This is useful for focusing on individual audio elements.
- An overview of the mixer layout is provided, highlighting five tracks on the right and a master track on the left that controls overall volume.
Master Volume Control
- Adjusting the master volume affects all tracks simultaneously, emphasizing its importance in managing overall sound levels during mixing.
- The speaker clarifies that this video serves as an introductory guide rather than an exhaustive tutorial, encouraging viewers to engage with the software confidently.
Recording Process Overview
- Challenges such as hardware conflicts or software issues may arise during recording; persistence is key to overcoming these obstacles for high-quality audio production.
- The speaker recommends using a metronome (claqueta) for timing when recording music, setting project tempo at 100 BPM in 6/8 time signature.
Step-by-Step Recording Technique
- After recording multiple takes, the speaker explains how to select and edit preferred segments from different recordings for final composition.
- Emphasis is placed on connecting microphones correctly and ensuring proper input settings are configured before recording vocals.
Layering Tracks and Monitoring
- The process of layering guitar tracks involves monitoring signals through headphones to ensure accurate playback while recording new parts.
- Duplicating tracks allows for experimentation without losing original recordings; one can mute unnecessary layers during editing.
Finalizing Mixes with Effects
- Balancing volumes across multiple tracks ensures clarity in the mix; adjustments can be made individually or collectively based on desired output.
- Introduction of effects like equalization (EQ), which adjusts frequency ranges to enhance sound quality by reducing unwanted noise.
Enhancing Sound Quality with Effects
- EQ settings allow manipulation of bass, midrange, and treble frequencies separately; this helps achieve a cleaner sound by removing harsh tones.
- Reverb effects create spatial depth in audio recordings; experimenting with different settings can significantly alter vocal presence within a mix.
Conclusion: Exploring Further Learning Resources
Exploring the World of Audio Production
Introduction to Audio Production
- The speaker expresses a strong emotional connection to their journey in audio production, emphasizing personal experiences and challenges faced along the way.
- They highlight the limitless possibilities within audio manipulation, encouraging curiosity and experimentation with various unconventional instruments and methods.
DIY Approach to Music Creation
- The speaker advocates for a DIY approach, suggesting that anyone can start producing music using basic equipment like a $20 microphone, a $30 interface, and free software.
- They stress that professional quality is not necessary to create enjoyable sounds; even simple setups can yield impressive results if one utilizes creativity effectively.
Conclusion on Musical Production Basics
- The video wraps up by reinforcing the idea that lack of professional tools should not deter aspiring producers from exploring their musical ideas.