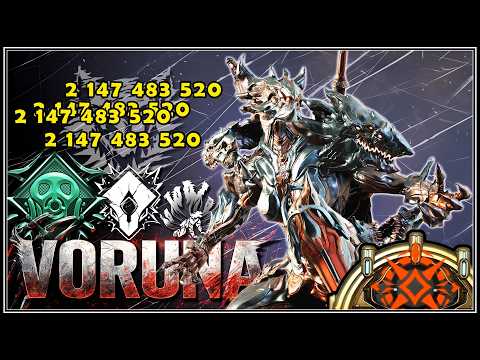
Qué hace a VORUNA una de las MEJORES WARFRAMES?
Warframe: The Power of Boruna
Overview of Boruna's Strengths
- Boruna is highlighted as one of the best melee Warframes in the game, capable of transforming any melee weapon into a powerful tool.
- The game's evolving nature is emphasized, with melee weapons gaining significant attention and relevance over time, making Boruna increasingly important.
- Key attributes include increased damage stats for all melee weapons, critical chance, status chance, and guaranteed slash damage.
Unique Abilities and Gameplay Enhancements
- In addition to boosting melee capabilities, Boruna offers movement speed enhancements, infinite energy abilities, and other gameplay benefits.
- Boruna possesses four passive abilities that are tied to her skills; only one can be active at a time based on which skill is being used.
Passive Abilities Breakdown
First Passive: Parkour Speed Boost
- Grants a 50% increase in parkour speed without scaling with ability strength; crucial for fluid movement during missions.
Second Passive: Status Immunity
- Provides immunity to status effects such as heat or slash damage; essential for survival against various enemy attacks.
Third Passive: Heavy Attack Efficiency
- Offers 100% efficiency on heavy attacks but capped at 90% by the game mechanics; useful for builds focusing on heavy attack strategies.
Fourth Passive: Lethal Attack Prevention
- Prevents lethal damage once every 60 seconds by rendering Boruna invulnerable for three seconds while restoring health and shields.
Skill Analysis: Sudario de Dinar
- Activating this skill grants invisibility for 14 seconds along with a 200% movement speed boost; duration increases with ability duration mods.
- Breaking invisibility provides significant bonuses including guaranteed status chance and critical hit bonuses specifically for melee attacks.
- If an enemy is killed while under these effects, the bonus duration extends up to eight seconds but does not stack indefinitely.
This structured overview captures key insights about Boruna's capabilities within Warframe while providing timestamps for easy reference.
Understanding Boruna's Melee Mechanics
Importance of Critical Stats in Melee Builds
- The effectiveness of melee weapons can be hindered by low critical chance, poor critical damage, and low status chance. This ability addresses these issues, allowing for more versatile builds that may not rely heavily on critical mods.
Application of Bonuses Across Attacks
- Bonuses from the ability apply to all types of melee attacks including conventional combos, heavy attacks, ground slams, and projectiles launched by certain melee weapons. However, there are exceptions regarding guaranteed slash damage.
Limitations on Certain Attack Types
- Guaranteed slash damage only applies to conventional combos and heavy attacks; it does not extend to other attack types. Weapons with innate multi-shot capabilities (e.g., gunblades or certain war fans) will have different interactions with critical stats.
Impact on Invisibility During Combat
- Using melee weapons that launch projectiles or have continuous attack patterns can forcefully remove invisibility upon impact with an enemy. This mechanic can disrupt gameplay flow if not managed carefully.
Explosive Status Effects and Their Consequences
- Explosive status effects create instances of damage after a delay but are treated as additional attacks by the game, which also results in loss of invisibility. Players should consider this when utilizing explosive statuses.
The Power of Stealth Damage Multipliers
Stealth Attack Bonus Mechanics
- When attacking while invisible, players receive a significant stealth bonus (up to 700%), effectively increasing damage output significantly for the first attack only. Subsequent hits do not benefit from this bonus due to enemy awareness.
Synergies with Other Abilities
- There are various synergies available through Boruna’s abilities that enhance melee performance beyond what other Warframes offer. These unique interactions allow for creative build strategies.
Exploring Colmillos de Rakash Ability
Overview of Colmillos de Rakash Functionality
- This ability allows players to leap towards a targeted enemy and inflict five random status effects with ten accumulations each. If the target is defeated, these statuses propagate to nearby enemies within a 7-meter radius.
Propagation Mechanics Explained
- Only statuses generated from the initial impact will spread; subsequent impacts do not contribute to propagation. This makes timing crucial for maximizing effect across multiple enemies.
Amplifying Damage Through Status Effects
- The ability excels at applying numerous status effects which can trigger viral or corrosive states, further enhancing overall damage potential when combined with condition overload mods.
Hidden Interactions Within Colmillos de Rakash
Unique Interaction Between Weapon States and Ability States
- An unintended interaction allows weapon-generated statuses to propagate alongside those created by Colmillos de Rakash if they match in type (e.g., slash). This adds complexity and strategy in using both weaponry and abilities together effectively.
Strategic Implications for Build Design
- Players must align their weapon states with those generated by the second ability for optimal propagation during combat scenarios. Understanding this dynamic is key to leveraging Boruna’s full potential in battle situations.
Understanding Damage Over Time Interactions in Warframe
Key Concepts of Damage Types
- The focus is on interactions with damage-over-time states, which are crucial for maximizing damage output, except for the explosion state that doesn't synergize well.
- A new melee arcane allows attacks to create multiple instances of all states affecting an enemy when they are knocked down, enhancing consistency and potency.
Mechanics of State Propagation
- Using a secondary ability can activate afflictions that propagate through melee attacks without needing to match the states directly.
- It’s essential to inflict a slash status effect using conventional combos or heavy attacks to ensure effective propagation of damage-over-time states.
Limitations and Challenges
- If an enemy is killed by direct damage rather than damage over time, the generated states from melee will not spread, which can be problematic with strong melee builds.
- Previous strategies involved using Garuda's Blood Altar for invulnerability; however, recent updates have rendered this synergy ineffective against affected enemies.
Recommended Strategies
- It's advisable to perform weaker melee attacks that still activate afflictions to maintain state propagation effectively. Future discussions will cover specific builds tailored for this synergy.
Enhancements Through Abilities
- Boruna has an enhancement called "Presa de Dinar," which marks nearby enemies as 50% more vulnerable upon activating her first ability while invisible.
- The range of state propagation increases significantly (up to nearly 50m), depending on skill strength and final range multipliers applied.
Energy Management and Synergies
- The third ability "Cacería Delicat" allows headshot kills to drop energy orbs; however, only headshots from weapons count—melee kills yield health orbs instead.
- This ability synergizes with the second skill since it generates five states in enemies, allowing for extended duration up to 60 seconds based on conditions met during combat.
Final Ability Overview
- The last ability "Descenso de Ulfrun" enables a mode where players can execute five consecutive attacks without using other weapons. Each attack deals area damage and inflicts ongoing damage over time on affected enemies.
Damage Mechanics and Skill Synergies in Gameplay
Overview of Damage Types and Critical Stats
- The attack has a guaranteed cutting damage, while area damage only inflicts 1000 without guaranteed cutting. These stats increase with skill strength.
- Each individual impact has a 20% critical chance and 1.5x critical damage, unaffected by skill strength or external bonuses.
- Eliminating enemies boosts critical stats: critical chance increases by 5%, critical damage by 1%, and overall damage can rise up to 200%, stacking five times.
Enhancements Through Skills
- Activating the first skill enhances the last ability's critical chance by 100% and doubles its absolute critical damage, which scales with skill strength.
- If an enemy is affected by any status, the player deals double damage, significantly increasing base damage from 5000 to much higher levels.
Synergy Between Skills
- The first skill synergizes well with others; for instance, the second skill applies statuses that allow for doubled damage from the last ability.
- The third skill allows eliminations from the last ability to generate health orbs, providing infinite energy under equilibrium mode.
Build Recommendations
- A build focused on the fourth ability is viable due to its synergy with all other skills; however, playstyle may dictate different choices.
- The "Ulf from" resistance mod restores charges of the last ability upon eliminating enemies within a radius when affected by cutting status.
Arsenal and Fragment Combinations
- For Boruna's arsenal, using fragments that enhance casting speed alongside full crimson fragments for increased skill strength benefits most builds.
- An alternative fragment combination focuses on melee usage; it includes one AR fragment for casting speed and one celestial fragment for energy management.
Critical Damage Considerations
- Violet fragments are beneficial as they provide higher multipliers than absolute critical bonuses from skills; this is especially true for high base-damage melee weapons.
- While some focus schools like Senurik may not be necessary due to Boruna’s energy efficiency, they can still offer advantages if specific attacks are unlocked.
This structured summary captures key insights into gameplay mechanics related to skills and their synergies while providing timestamps for easy reference.
Warframe Build Strategies for Boruna
Optimal Companion Choices
- The best option for Boruna is Maduray, leveraging its skill strength and energy transfer speed. If the Tauron attack is unlocked, it provides up to 90% extra skill strength.
- A strong companion choice is Kuro Raxa, specializing in survival with a precept mod called "Protect," offering shields and shield regeneration similar to the Sentinel's Guardian mod.
- Nautilus can effectively group enemies using its "Cordon" precept mod, enhancing melee attacks by hitting multiple targets simultaneously.
- Ticor can be used as a corrosive or viral electric weapon to inflict status effects on enemies while synergizing with other builds.
- Bulpfila Pancer excels at applying viral status to enemies and aids in energy management; however, it's less critical for this build.
Building Boruna: Synergies and Gameplay
- The upcoming build focuses on addressing concerns about Boruna's non-permanent invisibility during combat, ensuring effective gameplay without constant worry about survival.
- This build emphasizes health-based tanking through "Arcane Persistence," which limits damage taken to 500 per second if Boruna has at least 700 armor.
- Enemies defeated with melee attacks drop health orbs consistently due to Boruna’s third ability, allowing the use of the "Health Conversion" mod for increased armor from collected orbs.
- The second passive ability makes Boruna immune to heat and corrosive statuses that would otherwise reduce armor effectiveness, enhancing survivability.
- To ensure consistent healing beyond health orbs, players may consider using Sebahot's Penumbra ability for additional crowd control and healing support.
Considerations for Effective Gameplay
- While aiming for an easy gameplay experience with Penumbra is beneficial, players should also explore alternative healing options based on personal preference.
- A potential weakness of this build lies in its reliance on collecting health orbs; it performs best in missions with numerous enemies rather than one-on-one boss fights where orb drops are scarce.
- Players should be mindful that Health Conversion stacks diminish after taking damage within three seconds; thus maintaining enemy presence is crucial for sustaining armor levels.
Customization Options
- In terms of mods, players have flexibility; using Corrosive Projection is recommended but not mandatory.
- For Exilus mods, Preparation can start missions with full energy; however, alternatives like Powerful Derivation could enhance skill strength instead.
Warframe Build Strategies
Tanking and Health Management
- The state of toxin can also generate corrosive effects; using health conversion and arcane persistence is crucial for tanking methods.
- Arcane blessing with vitality is important for maintaining a broad health pool, enhancing gameplay comfort.
- Penumbra's effectiveness can be improved with the arconte mod to increase range, but it’s not essential if external healing sources are available.
Weapon Choices for Healing
- The Irudo Coda melee weapon heals a percentage of damage dealt when critical hits occur, making it a solid choice due to its decent attack continuity.
- A build that does not rely on critical hits can still be effective, especially when combined with Boruna's abilities that enhance status chance.
- Using the DaQ Amalgama bow with life steal mods allows any equipped nikana to heal upon dealing damage.
Advanced Melee Techniques
- The Sancti Magistar melee weapon provides healing through heavy attacks; however, it requires an initial normal heavy attack before slams will trigger healing.
- Slams are particularly effective due to the Magistar's evolution that increases ground attack radius and enhances critical hit potential.
Build Variations: Gas and Afflictions
- A gas and affliction build typically lacks consistency but becomes reliable with Boruna’s first ability increasing status chance.
- While gas may not always activate due to shared status distribution, the combination of skills creates powerful synergies.
Shieldgating and Invisibility Mechanics
- The second build focuses on shieldgating while utilizing invisibility effectively during melee attacks for safety.
- This approach allows for increased ability strength by incorporating elements like "Furious Advance" or "Roar" for enhanced damage output.
- Emphasizing skill efficiency over traditional builds enables better performance in combat scenarios without relying on persistent buffs.
Final Recommendations
- Utilize catalyst shields as they mitigate incoming damage when invisibility fades; maintaining this buffer is crucial during engagements.
- Ensure at least one augury mod is equipped on your secondary weapon to maximize survivability during combat encounters.
Build Strategies for Boruna in Warframe
Shield Regeneration Mechanics
- The build focuses on regenerating shields through the use of specific abilities, particularly the first and second skills, which are frequently utilized.
- A recommended melee weapon is the "daga oscura racta," which has a passive ability that regenerates shields when hitting enemies affected by radiation, effectively functioning as life steal but for shields.
Radiation Status Effects
- It's important to note that radiation status does not need to come from the melee weapon itself; it can be applied through teammates or other weapons.
- The "daga oscura racta" has innate radiation properties, allowing it to consistently apply this status effect during combat.
Melee Weapon Builds
Daga Oscura Racta
- This dagger excels with a high attack continuity (90%) and can be built for electric damage while incorporating body influence mods for enhanced state application.
Siam Nikana
- The Siam is highlighted as a special nikana that allows healing through Boruna's first skill when paired with specific mods. Its heavy attack launches a projectile that travels across map geometry.
- The projectile benefits from condition overload mechanics, enhancing damage potential significantly when combined with status effects.
Kurufel Melee Weapon
- Similar to the Siam, the Kurufel can launch projectiles but offers higher base damage and critical stats. It also requires careful management of invisibility due to its projectile mechanics.
Harmony Melee Weapon Strategy
- The Harmony melee weapon uniquely explodes all instances of damage over time into one powerful hit. This synergizes well with Boruna’s abilities, especially those providing guaranteed slash damage.
- This strategy allows players to achieve high damage outputs against enemies without direct elimination via standard attacks, maximizing overall effectiveness in combat scenarios.
Warframe Builds and Strategies for Boruna
Overview of Boruna's Build Mechanics
- Discusses the effectiveness of a hybrid build combining utility and damage to tackle high-level enemies across various missions.
- Introduces Kestrel Prime, highlighting its unique ability to trigger melee afflictions through explosions, setting the stage for synergistic builds with Boruna.
- Details a specific gas-based build for Kestrel Prime that utilizes lasting gas clouds to maximize damage output in conjunction with Boruna’s abilities.
Synergies with Exodia Contagion
- Explains how projectiles from Exodia can benefit from Boruna's first ability, emphasizing state probability as a key factor in ensuring guaranteed status effects.
- Highlights the importance of using specific mods like "Cambio Vigoroso" to enhance projectile damage consistently when switching between weapons and melee attacks.
Recommended Weapon Configurations
- Advises on weapon choices and modifications, suggesting quick-launching projectiles (like SAAs) to maintain invisibility while attacking.
- Recommends using specific spear types (Bala, Rugby, Docram), each tailored for optimal performance based on their respective handling characteristics.
Build Characteristics and Limitations
- Describes the unconventional nature of this build designed specifically for Boruna, focusing on status effects rather than critical hits due to her inherent capabilities.
- Emphasizes the need for attack speed mods to ensure rapid animations during combat engagements against tanky enemies.
Alternative Builds Focused on Slam Attacks
- Introduces another build centered around slam attacks that leverage Boruna’s first ability bonuses while maintaining invisibility post-slam execution.
- Suggests utilizing parkour speed enhancements to achieve higher jumps for effective slams, maximizing range and impact during gameplay.
Skill Selection Recommendations
- Offers two skill options: "Rugido de Rhino" for direct damage builds or "Susurro de Bachata" for damage-over-time strategies depending on player preference.
- Reiterates the necessity of incorporating Nira mods into slam-focused builds while optimizing parkour speed for enhanced mobility during combat scenarios.
Building Effective Damage Builds in Warframe
Overview of Damage Mechanics
- The importance of using at least one augur mod on secondary weapons to regenerate shields, ensuring consistent shield catalysts.
- Introduction of "Whisper of the SATA" as a key ability for generating additional damage instances, specifically void damage that scales with ability strength.
Synergy with Boruna
- Boruna's invisibility allows for significant damage multipliers; stealth attack bonus can reach up to 700%, enhancing overall damage output.
- The build can be adapted to any melee weapon that benefits from critical mods, emphasizing versatility in weapon choice.
Example Builds and Weapons
- Highlighting the Yad Kitag hammer, which features a unique mod called Blitz Vulcano that creates radial explosions scaling with enemy health.
- Explosions from Blitz Vulcano also generate additional void damage instances due to Boruna's invisibility buffing the attack multiplier.
Gas Affliction Build
- The Yad Kitag is positioned as an exception for gas affliction builds, leveraging both Blitz Vulcano and void damage mechanics.
- Emphasis on using faction mods to further enhance gas instances, although not strictly necessary for achieving high damage outputs.
Damage Over Time Mechanics
- Introduction of melee weapons like Sotes and Lexectenet that produce waves capable of activating body afflictions separately.
- Each wave increases the potency of afflictions over time; Sotes can create more waves than Lexectenet but both have similar performance potential.
Considerations for Continuous Attacks
- Continuous attacks from these melee weapons may disrupt Boruna’s invisibility due to their nature as melee attacks.
- Recommendations include waiting until wave animations finish before reactivating invisibility or spamming it during attacks.
Specific Builds for Sotes and Lexectenet
- Focus on creating a gas affliction build with Sotes while utilizing lasting effects through specific mods like Durable Chill instead of combo multipliers.
- Exec Tenet offers a unique approach by having zero state probability but can achieve 100% status chance through Boruna’s abilities.
This structured overview captures essential insights into building effective damage setups in Warframe while highlighting specific mechanics and strategies related to various weapons and abilities.
Build Strategies for Boruna in Gameplay
Heat and Gas Builds
- The concept of heat as a state is discussed, emphasizing that it does not guarantee an explosion or impact but can be consistent with the right build.
- A melee weapon is highlighted for its high damage potential, particularly when combined with Boruna's abilities and melee afflictions.
- The Harmony melee weapon is introduced, which has a passive ability to explode all instances of damage over time during heavy attacks, including slams.
- It’s suggested to focus on toxin as the primary damage-over-time state due to its synergy with mods that enhance elemental damage.
- For maximum damage output, enemies should not die from direct hits; instead, they should succumb to damage over time effects.
Building the Harmony Melee
- A full toxin build for the Harmony is recommended while acknowledging other viable states like heat or gas.
- Introduction of the "Boruna Nuke" strategy where her second ability spreads states effectively across enemies.
- The basic strategy involves spamming the second ability on marked enemies to maximize state spread and achieve significant area control.
- Caution is advised regarding energy management since this strategy relies heavily on abilities rather than melee attacks for kills.
- Using a backup melee weapon is recommended to recover energy when needed during gameplay.
Enhancing Damage Output
- The use of Raging Roar (Rino's ability) alongside specific mods can significantly boost damage over time from Boruna's second skill.
- While using a mech set isn't mandatory, it enhances state spreading capabilities and overall effectiveness in combat scenarios.
- Suggested mod configurations include using Corrosive Projection in place of Mecha Pulse if opting out of mech sets for flexibility in builds.
- Emphasis on maximizing range through various mods ensures optimal performance in applying status effects across multiple targets.
Build Strategies for Raxa and Boruna
Overview of Raxa's Build
- Raxa is highlighted for its survival capabilities, particularly through the mod "proteger." The build can be adapted to other weapons by replacing precept mods.
- Emphasizes the importance of using a melee affliction weapon to enhance the effects of the second ability, allowing for better spread of status effects.
Attack Strategy and Weapon Choices
- Discusses potential issues with combo attacks; if an enemy dies from initial damage rather than damage over time, status effects won't spread.
- Normal combo attacks are preferred over heavy attacks due to their lower damage output, which helps maintain synergy. Recommended weapons include scythes and blades/whips.
Consistency in Synergy
- Notes that achieving consistent synergy can be challenging on base steel paths due to high enemy buffs. A weaker version of the strategy is suggested for lower-level enemies.
- The build remains similar regardless of whether players choose to use mecha sets or not; however, swapping "tormenta de hielo arcana" for "ataque arcano" may enhance performance.
Weapon Recommendations
- For scythes, "hate incarn" is recommended due to its strong stats and ability to generate heat status effects through its mod.
- For blades/whips, "Dorglif" is noted as a comfortable option with decent damage stats and compatibility with affliction-generating mods.
Final Build Considerations for Boruna
- Introduces a final build focusing on Ulfrun's descent as a primary damage source. This skill benefits from various multipliers but requires careful management of synergies.
- Highlights how combining abilities can create area damage through effective state spreading when conditions align correctly.
This structured approach provides clarity on weapon builds and strategies while ensuring easy navigation through key insights via timestamps.
Guide to Boruna's Build and Skills
Importance of Skills in Boruna's Build
- All skills are crucial for enhancing Boruna's abilities. The first skill amplifies damage bonuses from the last skill, while the second can weaken enemies and spread effects from the last skill.
- The third skill provides infinite energy by counting enemy eliminations as melee kills, allowing health orbs to drop from defeated foes.
Survival Mechanism
- This build excels in survival due to constant invisibility; the first skill keeps you hidden until an attack is made with the last ability, after which invisibility is quickly restored.
- The build scales effectively against enemies of any level, ensuring consistent performance throughout various challenges.
Equipment and Mod Recommendations
- Using a specific set (mecha set) enhances individual damage output significantly. Area damage isn't as impactful, so focus on supporting skills instead.
- It's essential to equip a secondary weapon mod (augurio), along with healing mods that complement the mecha set for optimal performance.
Conclusion on Boruna’s Capabilities
- Boruna stands out as one of the best melee users in the game, enabling complex synergies and interactions that enhance gameplay enjoyment.
- With upcoming releases like Boruna Prime, players are encouraged to explore her capabilities further for a fun experience.